Crazy Easy & Cheap DIY Outdoor Lighting Project
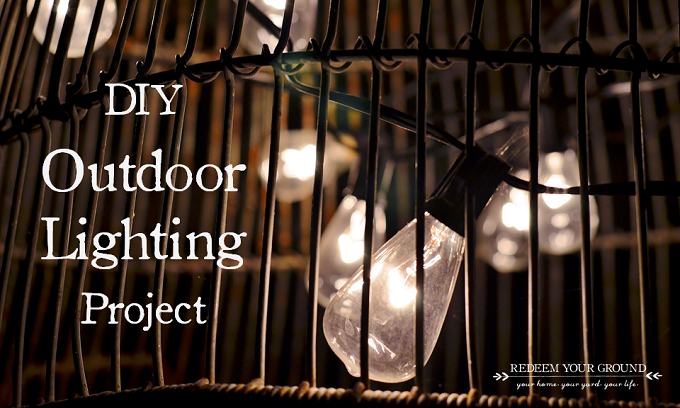
This was such a cheap and easy project that I don’t really have much to write about. Regardless…we couldn’t be happier with how the DIY outdoor lighting project we did for our pergola turned out. And the really cool thing is, we used mostly materials that we had just lying around.
It provides just the right amount of light to turn an outdoor space that we love hanging out in during the day into a cozy spot we now can enjoy well into the night. Check it out for yourself…it’s almost too easy not to try.
![]()

Materials
-
- Old wire basket: A few years back, while meandering through an outdoor ceramic shop I saw an old wire basket half-submerged in leaves. When I asked the guy how much he’d sell it to me for, he thought I was pointing at some gaudy statue and said slyly…$500. When I quickly redirected him…looking both disappointed and a bit confused, he shrugged and said…um, 10 bucks. Sold!
[At first I had no idea what kind of basket it was, but after searching a bit I discovered that it’s a potato basket. And for one the size of mine it would cost close to $100 retail…but a new one wouldn’t have the wonderfully nasty, rusted character mine has. So I think it’s a pretty good find at a 90% discount. Initially it sat on our back porch where we’d threw our muddy boots. But after I created a boot and tool storage console of sorts out of an old metal nesting box, my old potato basket was without a use…until now!] - Manilla rope: I had some old Manilla rope left over from our hanging daybed…that had gotten nice and weathered (not that it needed to be) draped over the fence near my potting bench.
- A strand of outdoor string lights w filament bulbs: The one thing I did have to purchase was a 10-bulb strand of string lights. At first I had planned on using a set of Christmas lights, but since the basket was really old looking I thought I’d use old-fashioned looking lights. So I bought a strand of string lights with filament bulbs from Target for about $25. But if you have some other string lights or Christmas lights hanging around…and you don’t want to spend any more mullah, I’d use those instead of buying anything any fancier.
- Outdoor extension cord: Much to Britt’s chagrin, I tend to over-purchase…never wanting to run out of food for a cookout…or whatever the situation. So when I was putting up our Christmas light balls last year I bought one too many outdoor extension cords. That said, I guess since I had never used it, you could say that I had to purchase it for this project too…so another $15 bucks or so.
- Old wire basket: A few years back, while meandering through an outdoor ceramic shop I saw an old wire basket half-submerged in leaves. When I asked the guy how much he’d sell it to me for, he thought I was pointing at some gaudy statue and said slyly…$500. When I quickly redirected him…looking both disappointed and a bit confused, he shrugged and said…um, 10 bucks. Sold!

Instructions
Not only was this project really cheap, it was embarrassingly easy to do.
-
- String the lights:
-
- The first thing you need to do is remove all of the bulbs from your strand of lights and put them in a safe place. Otherwise, I guarantee that you’ll break said bulbs. I learned the hard way…which is why my 10-bulb strand is now a 9-bulb strand!
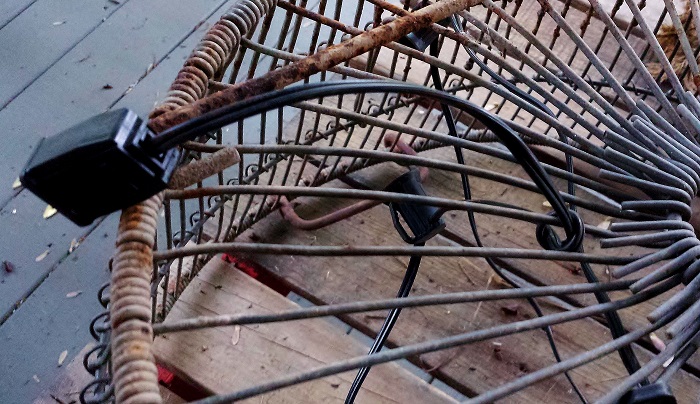
- Placing the bulbless strand of lights inside your basket, pull the male end through the bottom of the basket…which will end up being the top of your lovely “new” outdoor chandelier. Then tie a simple knot with the extension cord around one of the wires in your basket. This way you won’t put too much pressure on the cord.
-
- String the lights:
-
-
-
- To arrange the lights, simply go back and forth across the basket connecting some of them to the basket using their handy-dandy clips…leaving some of the others dangling. If you’re using Christmas lights you could use wire to connect them to the basket.
- Now, screw all the bulbs back in their sockets.
- Plug in your lights to see if you like how things look…and then rearrange them until your heart’s content.
-
-

-
- Hang the basket:
-
- Loop the rope through the bottom of the basket…err, the top of your funky chandelier.
- My potato basket has a hole of sorts in the center, making this easy to do; however, if your basket doesn’t, simply use wire cutters to make a large enough hole(s) to run your rope through. Or you could use all sorts of hooks or wire to attach the rope (or chain if you’d prefer) to your basket.
- Once you position the chandelier at the right height, loop the rope over one of the rafters and tie the two ends of your rope with a few granny knots. There may be a better knot to use…but I’m no Eagle Scout.
- By the way, I did this project solo…so I had to keep one eye closed and stick out my tongue just so to hang my light. So this is one step of the project that would be made a bit easier if you had a helper. All of my potential helpers were otherwise occupied.
- Pull the knot to the top of your loop to make it mostly out of view.
- If you don’t have a rafter to hang your light from, you could simply use an eye-bolt screwed into the ceiling of your structure.
- The last thing to do is to connect the extension cord to the light…bring it across the rafter or ceiling and down toward the outlet.
- You’re done…and the whole process will probably take you less than 15 minutes.
- Now all you have to do is wait for the sun to go down and plug’er in and enjoy!
-
- Hang the basket:
![]()
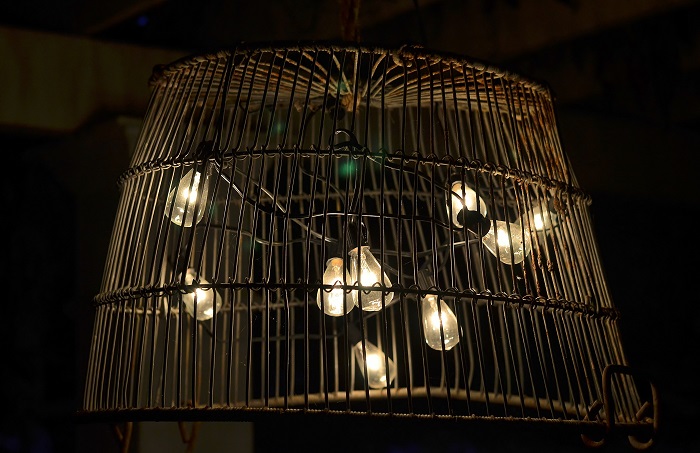
There you have it…a pretty cool outdoor chandelier that cost us only about $35 and took less time to create than it would have to make a sandwich. Okay, maybe not…but you get the picture.
We love it. Not only does it give our pergola a personal touch…it extends the use of one of our favorite outdoor hang-out spots way beyond the daylight hours.
So what random objects did you have lying around your home that you reused to create something that’s functional, interesting to look at, and with a story to tell? Please share…and perhaps you’ll inspire someone else to do the same.
Cheers friends,

Affiliate Disclosure: RYG may earn a small commission from qualifying purchases when links take you to Amazon.com. Learn more…
You may also enjoy these posts from RYG ...

![Basic How-To’s for Planting Plants [Video for Exmark]](https://redeemyourground.com/wp-content/uploads/2017/03/Redeem-Your-Ground-Exmark6-150x150.png)
![How to Hang String Lights [Video with Exmark]](https://redeemyourground.com/wp-content/uploads/2015/06/4th-of-July_String-lights-_-RYGblog-150x150.jpg)

If you're not already subscribed to RYG and want to get periodic updates, links to new posts & other ground redeeming info ... just enter your email address below. Easy as that!
Awesome project Doug. Just right for a guy like me (who seems to be a lot like a guy like you). Thanks for sharing this.
Thanks Joe. Yea, I’m a sucker for projects that are cheap and easy…that still provide a pretty big impact. This is definitely one of those projects. And I’m sure you have some sort of container or apple/fruit basket at your farm that you can turn upside down to make a really cool outdoor light. Take care my friend and thanks for chiming in! – D.