DIY Painted American Flag Door Hanger
Just in time to help you celebrate the 4th of July, I’ve got a great patriotic craft project for you…a painted American Flag Door Hanger! It’s fun, easy, and very inexpensive…and regardless of how crafty you are, I’m certain it’ll turn out super cute! Oh…and it’s very kid-friendly too…so if you’re looking for a project to do with your kids this Fourth, this one is perfect for you.
What You Will Need
-
- Pencil
- Ruler
- Red, white and blue acrylic paints
- Paint brushes (we used the sponge type)
- Kitchen sponge
- Scissors
- Permanent marker
- 7 wooden paint stirring sticks (we used the large ones this time, but have used the small ones in the past)
- Twine
- Stapler
How to Make Your American Flag Door Hanger
1. Getting ready to paint…
-
- Star Section:
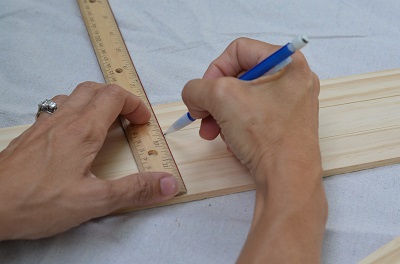 On 3 of the 7 sticks, lightly draw a line with your pencil in the center. This will be the guide for painting these sticks with two colors. I suggest that you do this with all of them lined up evenly to make sure that the blue star section of the flag lines up evenly when you hang the sticks together.
- Since you will be painting these and all the other sticks, make your marks on the side that does not have writing…so that when you do paint them, you don’t have to paint too many coats to cover up the words.
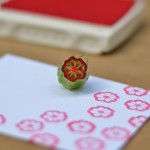
- Star Stamp:
- Go ahead and cut out your star stamp before you get started painting too…unless of course you want to freehand paint your stars, but I tend to like the sponge effect for this since it gives it a little varied texture.
 You can make a star stamp out of a kitchen sponge…but any ole’ sponge will do.
- Draw a five point star in permanent marker on the sponge and then cut it out. It doesn’t have to be perfect, but it does need to be able to fit on the width of one paint stick. Don’t worry if you can see the marker lines when you cut it out…it won’t affect the stamp image.
- Star Section:
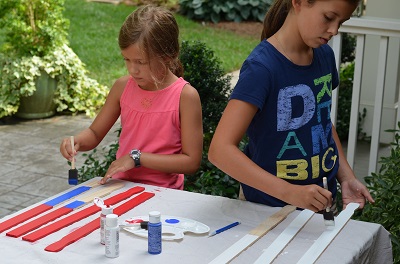
2. Now it’s time to get painting:
-
- Red Stripes:
- Paint 2 Sticks Red.
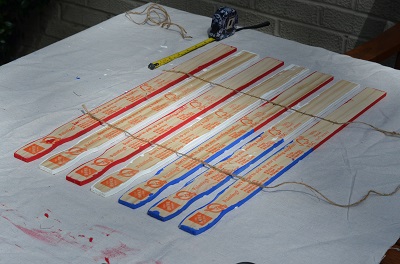
- Paint Half of 2 of the Marked Sticks Red: While you have your red paint out, go ahead and paint half of 2 of the marked sticks red too. Paint the half that does NOT have the little indented head…the handle.
- Coverage: You will probably want to do 2-3 coats just to get good coverage. I also suggest painting the side edges of the paint stick all the way around to give it a finished look. But you will probably only need one coat for that.
- White Stripes:
 Paint 2 Sticks White.
- Paint Half of the 1 Remaining Marked Stick White: While you have the white paint out you will also want to paint half the 3rd marked stick white too. Remember to paint the half that does NOT have the indented handle.
- Coverage: The white paint will most likely need a full 3 coats of paint. Don’t forget to paint around the edges of the white sticks too.
- Star Section:
- Paint the Halves of 3 Sticks Blue: Next you will paint all 3 of the other halves of the half-painted sticks blue…and don’t forget the side edges.
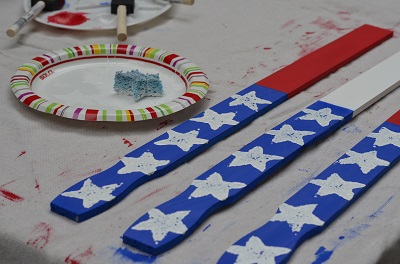
- Paint White Stars: Once the blue paint has dried, you will use your star sponge to stamp the blue section with white stars. Pour your white paint on a paper plate and then dip your sponge in it. I dab it a few times on the plate spreading the paint a bit so that some of the excess comes off and to get even coverage on the sponge. I like odd numbers, so I chose to do five stars on each stick. I shift the position of the star a bit each time and sometimes let the star hang off the edge to give some variety.
- Red Stripes:
3. Putting your painted American Flag Door Hanger together…
-
- Form Your Flag:
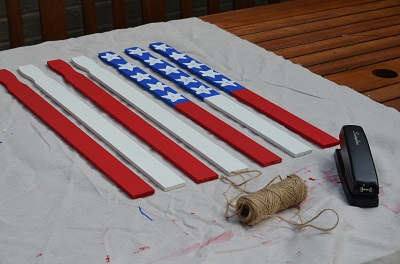 Once all the painted sticks have dried, arrange them face side up to form your flag. The top stick will be one of your 2 blue & red sticks and your bottom stick will be one of your red sticks…and you can fill in the rest. Also, you will note that I chose to put all the indented handles on the same side.
- Then…systematically turn all the sticks over one-by-one to ensure that they are all lined up appropriately on the front – since from here on out you will be working from the back.
- Spread the sticks out with about 3/4” between each stick…trying to keep them equidistant from each other. To make it easier, I simply used the width of my finger as the consistent measurement between the sticks.
- It’s important to make sure the ends of your sticks are lined up at all times during the assembly process.
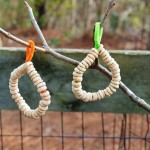
- Connect the Sticks:
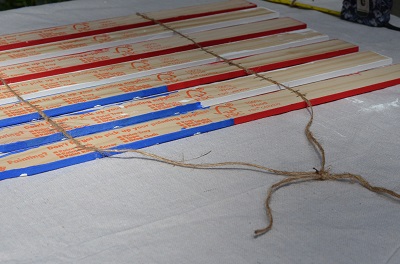
- Use Twine:
- I’ve used thin wire in the past, but it was a little finicky to work with. So this go round, I used twine…and not only was it much easier to work with, I think it looks better too.
- Measure out 2 pieces of twine each measuring about 26” or longer if you want to tie a floppy bow at the top when you are done.
- Staple the Twine to the Sticks:
 You will start by stapling the first piece of twine on the bottom stick approximately 6” from the edge of the stick/flag. Leave a little tail of twine below the first staple…and before you staple any more, tie a knot with the tail around that first staple. You can trim any excess that shows later.
- Then proceed up the flag one stick at a time…stapling the twine to each of the sticks 6″ from the edge. Try to keep your twine taut, but at the same time making sure not to pull the sticks out of their positions. I suggest holding the twine on the stick you are working with and concentrating on just keeping one stick at a time in place.
- When you finish stapling the twine one side, you will then do the same thing on the other side, coming in 6” from the other edge with the 2nd piece of twine.
- Once you are done stapling the twine to both sides of the sticks, you can pick up your flag and see if you need to do any adjusting…which might require taking some staples out to re-position. Note that the twine can still slide through the staples from top-to-bottom, so you do have some room to adjust the spacing between the sticks.
 Once you are happy with how things are hanging together, go back through and put a second staple on next to the original staples to keep things securely in place and to help keep the sticks from rotating forward.
- After your second round of stapling, you will then tie the ends of the 2 pieces of twine together at the top in a double knot…or a floppy bow if you prefer.
- Use Twine:
- Form Your Flag:
That’s it…you’re done! Now all that’s left is for you to hang it on your door and start celebrating the Fourth in style!

Take care…and Happy 4th of July – from our back door to yours!


If you're not already subscribed to RYG and want to get periodic updates, links to new posts & other ground redeeming info ... just enter your email address below. Easy as that!
I just got some paint sticks today. I cannot wait to have my children each make one of these flags. AWESOME idea, Britt!!!
You go…you ole’ crafty one! If you want to see one up close and personal, come on over to our backdoor…and if you do, please knock! Take care, D.