How to Plant Hydrangeas
Last week I started a series of posts on hydrangeas…which seems to be one of everyone’s favorite plants – particularly here in the South. My initial post was all about the “what”…outlining the importance of knowing what kind of hydrangea is best for your space…and noting that there’s a ton you can get by simply looking at the scientific name. Today I’m going to provide you with a few tips on one of the “how’s” – how to plant hydrangeas …and care for them. Having the “what” and this “how” under your gardener’s belt should go a long way to help you enjoy these floral lovelies for years to come.
![]()
The Basics on How to Plant Hydrangeas
Don’t over-complicate planting hydrangeas. Like all other plants, there are better times of the year to plant them than others…and then after that, all you need to do is: pick the right location, put them in the ground, then water and feed them. That’s it. But…because you’re probably tuning in for a bit more goody than that, I’ll continue…
1. Plant in Spring or Fall
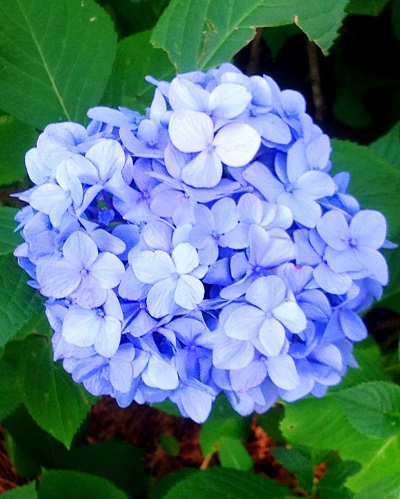
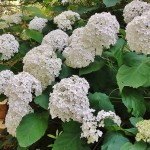
Nikko Blue Hydrangea (H. Macrophylla)
It’s always best to plant any plant…really, in the spring or fall – when the weather is more temperate…not too hot and not too cold. Being ripped out of one home (a pot) and then thrown into another (the ground), can be a bit stressful on your hydrangeas…so try not to give them anything else to stress over. And if you can wait, fall is actually best…that’s when your hydrangeas are putting all their energy into going down…growing a good root system, which will help them withstand the heat of the hot summer months. In the spring, however, much of the energy is going up…into growing leaves and flowers. So if you can choose, your plants have a better chance of thriving with a strong root system. One of the challenges to planting in the fall, though, is that because hydrangeas are deciduous (lose their leaves), you have to trust that what’s in the pot is what the label says it is and that the plant is healthy. So buyer beware!
2. Pick the Right…Location, Location, Location
Location is not only a critical factor in real estate, it’s also critical when planting hydrangeas – location can definitely make or break how much you have to work at and then enjoy your hydrangeas. I touched on this in last week’s post…it’s vitally important to understand that different hydrangeas like different growing environments…particularly when it comes to sun. Some like just a bit of sun, while others thrive in quite a bit. (Do note, however, that morning sun is much preferred to scorching afternoon sun.)
It’s also important that you place your hydrangea with enough room to grow…both up and out…so that your placement ultimately achieves your design objectives and doesn’t create a maintenance issue. Again, some hydrangeas remain pretty small, while others grow quite large. Now that said, you might feel really funny planting a young hydrangea in a large space, especially in the fall when it’s dormant and has no leaves…but don’t rush it by planting for that moment in time, space your hydrangea for the size it will be when it matures.
 So with all that said, it’s paramount that you read the label…read the label…read the label. I’m repeating myself because I know for some of you, that’s a lot to ask…it is for me. Being a do-it-yourself kind of guy, I usually just push through and only read the instructions when I’ve really screwed something up. But…I do try my best when it comes to reading plant labels…they provide the critical information you’ll need to know to place your hydrangea where it will most likely thrive.
So read the label…and then find a location that matches the growing conditions of your space…or vice versa. If you don’t…it could make the difference between easily growing a lush, prolifically blooming shrub or one that struggles to get one lousy bloom on its scraggly branches.
3. Put It In the Ground
Sure, this sounds easy enough…and it is, but if you follow a few simple steps, your efforts will be greatly rewarded:
- Dig a hole that’s about 2 times wider than the root ball and about as deep.
- Place the hydrangea’s root ball in the hole (if the root ball is compacted, score it several times with your shovel or trowel to loosen the roots).
- Fill the hole about 1/2 way up with the native soil (what you dug up) mixed with some rich topsoil or compost.
- Then fill the hole with a few inches of water…and allow to drain fully. If it seems to retain water, mix in some additional compost or peat to help with drainage.
- Once fully drained, fill the rest of the hole with the native/top soil mixture…so that it comes to where your
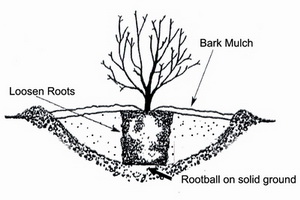
(Diagram from hydrangeashydrangeas.com.)
hydrangea was sitting in its container. If the root ball is too high above the ground, its roots will dry out and leave your hydrangea unstable…and if planted too low, it could promote root rot. (I’ve found the handy-dandy diagram to the right from the Hydrangeas! Hydrangeas! website that I thought you might find helpful. If you go there, take a look around, I’m sure you’ll find a lot of other helpful information.)
- Press down on the dirt so that there are no air pockets and to ensure that your hydrangea is firmly in place.
- Top dress with a couple of inches of mulch…this will help retain water.
- Water…again.
4. Water Them
Clearly, watering your hydrangea when you plant it is critical…as noted above. That said, hydrangeas are one of those finicky types of plants that need their water…their roots drink it up quickly; but not too much…otherwise their roots will rot out. That’s why you need to pick a place to plant your hydrangea that has well-drained soil. That’s also why, if your soil tends to hold water (e.g., high clay content) it’s important that you add compost or peat to help ensure better drainage.
From there you’ll want to make sure that your hydrangeas get a good, deep drink of water at least once a week. During the really hot months or when it hasn’t rained in a while, you may need to give your hydrangeas another good soaking. And keep a few inches of mulch around the base to keep the water from evaporating unnecessarily.
5. Feed Them
Giving your hydrangeas some good compost rich soil when planting them will give them a good start. However, to keep your hydrangeas looking their best, you’ll want to give them a boost…particularly through the growing season. Some suggest that different types or colors of hydrangeas require a different fertilizing regime…and they are probably right, but that tends to get me all confused and overwhelmed, so I treat them all the same. With that, I simply suggest that you give them a nice balanced, water-soluble fertilizer (10-10-10) in the spring…and if you think about it and have the time, you can give them another feeding in the summer.
![]()
So there you have it…all you need to know about planting your hydrangeas. Well, I’m sure there’s more to know…but these are the basics and should get you well on your way to enjoy them gracing your outdoor spaces.
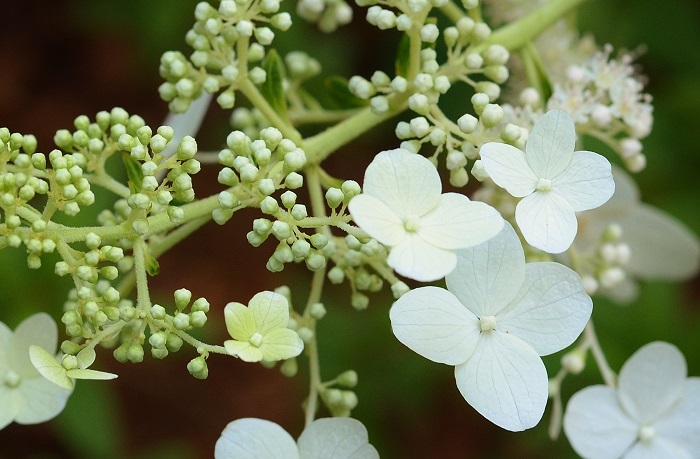
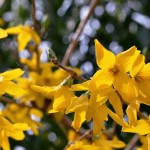
Close-up of Tardiva Hydrangea bloom (H. Paniculata)
Check back in for future posts on hydrangeas…next week I’m going to focus on how and when to prune them.
Take care all,

You may also enjoy these posts from RYG ...

If you're not already subscribed to RYG and want to get periodic updates, links to new posts & other ground redeeming info ... just enter your email address below. Easy as that!
THANKS FOR THIS INFO !!
Thanks for your suggestions.
the information was very helpful i’m planting my hydrangeas this spring
Hey Mamie…so glad the info was helpful. Hopefully your hydrangea planting efforts were a success! Cheers, D.