How to Dry Hydrangeas…and Now’s a Great Time for Those Late Bloomers!
Alright…it’s confession time. I found out how to dry hydrangeas by accident. I wasn’t trying to create a dried flower arrangement that would grace our home for years to come when I forgot to water it…but that’s what happened. In fact, quite a few of our dried hydrangeas are a result of my neglect.
So if want to know how to dry hydrangeas … and you have some sitting in a vase right now, you basically already do. Just let them drink up all their water and there’s a really good chance that in a few weeks you’ll have some dried hydrangeas of your own. However, now that I’ve dried them a few times intentionally, I’ve found out why it’s likely worked for me during my more negligent times. So I thought I’d share a few things that I’ve learned.
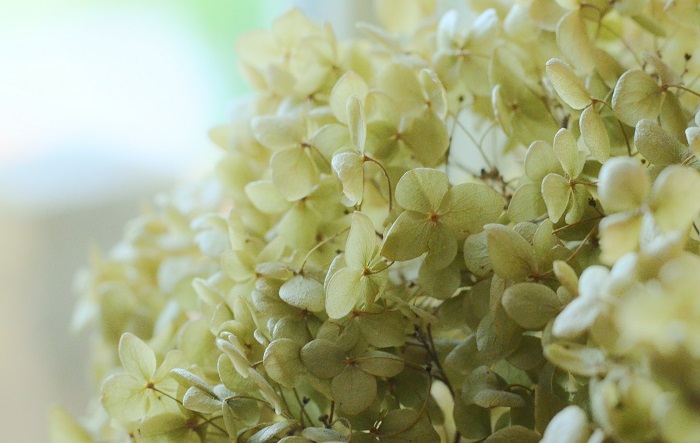
(By the way, there are other, slightly more involved ways to dry hydrangeas…and if you’d like to learn about those, I’ve included some links at the bottom of this post.)
![]()
What You Need to Dry Hydrangeas
-
- Hydrangea blooms
- Tall vase
- Water (I know…it sounds counter-intuitive, but trust me.)
- Hairspray (Again, trust me.)
How to Dry Hydrangeas…Water Method
Yes, I realize it sounds a bit backwards…using the water method to dry hydrangeas, but I’m telling you…it’s the easiest way to do it. So here’s what you do…
-
- Cut:
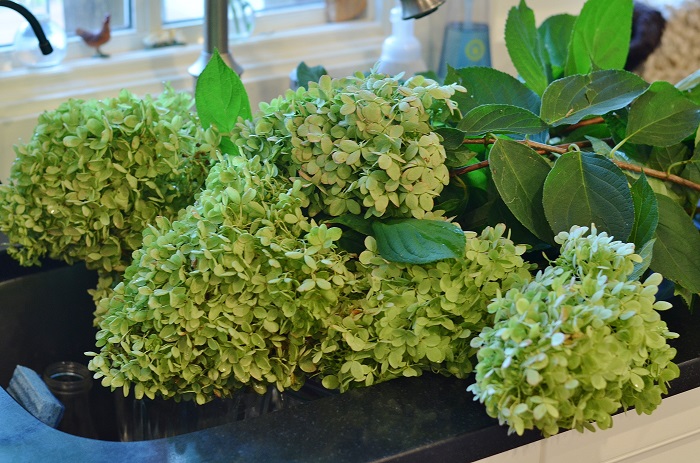
- Cut the number of hydrangeas you want to dry…or want to include in whatever cut flower arrangement you’re working on.
- Cut them 12-18” long. I usually make the first cut longer than that and based on where it would keep the shrub in good form…and then cut all the stems to size once I have them all together.
- By the way…after I gather up all my blooms, I point them all down and in the same direction…and then shake fairly rigorously. This will keep most of the bugs and other loose material outside…and not in your house.
- Cut:
-
- De-Leaf:
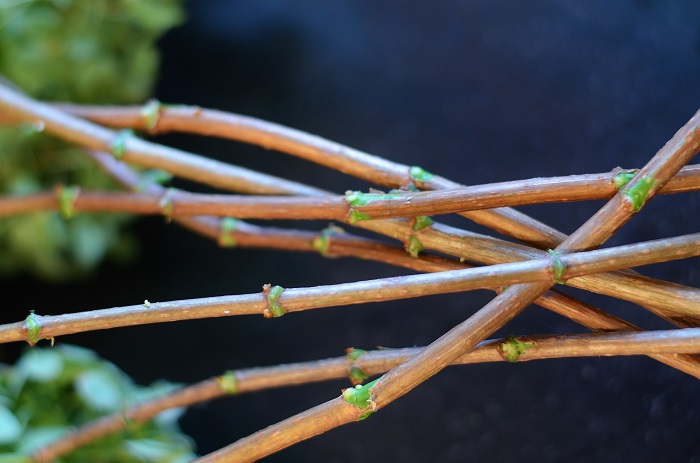
- Simply grab a stem at the top just below the bloom, hold on tight and run your hand down…ripping off the leaves as you go. I guess you could go up…but if you do, you risk gaining too much momentum and ripping off the bloom too.
- I often do my de-leafing in the garden and just let the leaves stay in my beds as natural compost…but if you do it inside, strip your stems right over a garbage can…it makes for a much easier clean-up.
- De-Leaf:
-
- Put in a Vase:
- If you want to enjoy your hydrangeas before they dry…which I don’t know why you wouldn’t, simply arrange them as you would any other flower arrangement…which will take a bit of trial-and-error from a placement perspective.
- I usually hold all of the stems in one hand…and then with the other hand move them around so that the flowers pointing up the straightest are in the middle and the smaller and/or droopy ones are on the sides. Then after eyeing their height relative to the vase I make my final cut…all at the same level.
- I’ve read that you should then mash the bottoms of your stems with a hammer to help with their water uptake…but I’ve never done that…but feel free to try.
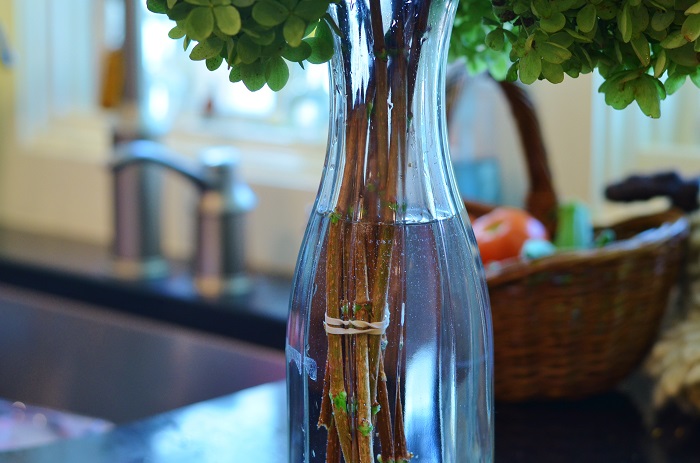
- To keep them in place I wrap a twist-tie or a rubber band around the stems…just before putting them in the vase.
- Put them in a tall enough vase to support the length of your stems…and then tweak the positioning of the blooms.
- Add Water:
- If you don’t have a faucet that extends with a hose, I’d recommend adding the water before you add the flowers. If you do have one of those fancy faucets, do it either way.
- I’d typically fill the vase ½ to ¾ of the way full…just make sure all of the stems are well into the water.
- Put in a Vase:
-
- Dry:
- Depending on the condition of the flowers when you start the drying process, you may need to continue adding water until they are dry. Otherwise, I’ve found that they will wilt…and then dry wilted…which isn’t very pretty.
- So if the blooms are still fairly supple, keep watering. But once they’ve dried out…they’ll feel and look like paper…you can stop watering them.
- After a couple of weeks you’ve got a beautiful dried flower arrangement that you can enjoy for years to come. We actually have a couple on our mantel that have been there going on 9 years.
- Spray:
- Once your hydrangeas are fully dried, spray them down with aerosol hairspray (sorry, aerosol spray just works better than the pump spray kind…it just does).
- I used to think that this was to coat the flowers so that their color would be preserved a bit longer. But now I think it’s simply to help keep the florets together…so that they are less likely to fall off when you brush up against them…making quite the mess.
- Dry:
Other Tips to Drying Hydrangeas
So as you can see…drying hydrangeas is really very easy. That said, there are a few tips I want to share to improve your chances of success:
-
- Although you’d like to think you could dry hydrangeas when they are at their peak of color, it really doesn’t work out that way. Fresh blooms tend to wilt before they dry…it has something to do with their moisture content. So your best bet is to not cut your flowers until after they’ve already started to dry while on the bush. August into the fall is usually a good time to do that. And besides, I think hydrangeas blooms that have matured a bit are more interesting…somewhat vintage-y looking…which I like.
- Don’t cut them when they are wet. Again, this is a moisture content deal…and so if you do you’ll just increase the chances of all or parts of them wilting before they dry. So don’t cut them early in the morning or after a good afternoon rain storm.
- If you want to be fancy or if you’re not into a one-note flower arrangement, feel free to add other dried flowers to your hydrangeas…flowers you’ve bought or have dried yourself. Be crazy like that…go wild…you can.
- I’d also recommend that you put your dried hydrangeas somewhere up and out of the way…somewhere that they won’t likely be brushed up against…so not in the playroom on the table that everyone runs past. They are really just too fragile…and no amount of hairspray can keep them from breaking apart.
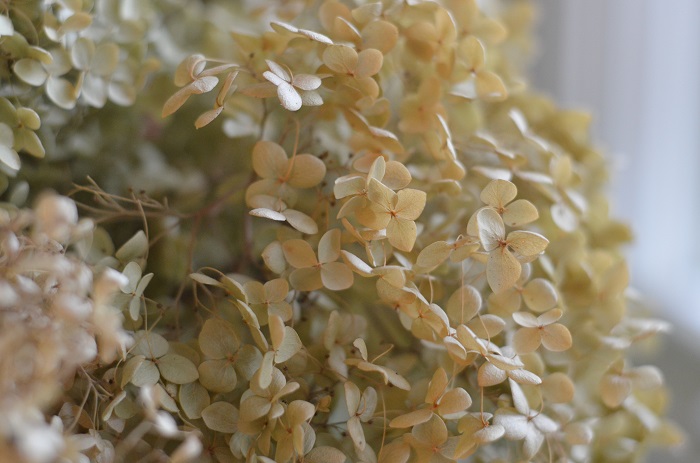
![]()
So there you have it…an embarrassingly easy way to dry hydrangeas. Try it…it really couldn’t be easier. And if you do, I think you’ll do it again…it’s just a great, easy, and free way to bring a little life from the outside into your home.
Please share your experiences…or if you’ve dried hydrangeas before, please share your tips.
Take care,

Other Related Links
- Links to Other Methods of DryingHydrangeas:
- Hanging them upside down…from eHow
- Using glycerin…from Garden Guides
- Using silica gel…from eHow
- Post on the Different Types of Hydrangea
- Post on How to Plant Hydrangeas
- Post on How to Prune Hydrangeas:
- Suggestedpruners:
- For most pruning you’ll need bypasspruners:
- Felco pruners ($$$)
- Corona pruners ($)
- For your larger hydrangeas like your ‘PeeGees’ you may needloppers:
- Felco loppers ($$$)
- Corona loppers ($)
- For most pruning you’ll need bypasspruners:
Disclosure: Redeem Your Ground may earn a small commission from qualifying purchases when links take you to Amazon.com. Learn more…
You may also enjoy these posts from RYG ...
If you're not already subscribed to RYG and want to get periodic updates, links to new posts & other ground redeeming info ... just enter your email address below. Easy as that!




I purchased white hydrangeas at a florist and cut the stem, removed the leaves and put them in water, only to find them wilting in a day or two. I really want to dry them – please help! Can you dry purchased hydrangeas successfully?
Hey Lee…thanks for reaching out. I’ve never dried store bought hydrangeas, but I don’t see why you can’t. That said, as you’re suggesting, if you’re not able to bring them back to life, drying wilted hydrangeas won’t get you the look your going for! So what I’ve found to bring my hydrangeas back to life (and really most any cut flower), is to put them in boiling water. It’s something I learned from my mother-in-law…and I’ve found it really does the trick. It’s not very complicated…boil water and put them in it. But if you want to read a humorous how-to on this, check out this post I found on “The Art of Doing Stuff” – http://www.theartofdoingstuff.com/flower-of-the-week-the-wilted-sorry-ass-hydrangea-how-to-bring-it-back-to-life/. I hope this helps. Take care, D.
Something else you can do with dried hydrangeas is mist them with spray paint. This sounds tacky, but it can be beautiful to lightly dust them with gold and put a bow on the vase to decorate for the holidays.
I have only been occasionally “lucky” drying hydrangeas. Thank you for this helpful article. I believe I did what you suggested just by coincidence, and that was when I was successful.
Hey Beth…I’ve never done that, but I’ve seen the finished product of someone how has. And your right, for the right occasion this can look really cool…i.e., the holidays. Glad you found the post helpful…and thanks for chiming in…so appreciate it. Hope you have a nice weekend and Thanksgiving week. Take care, D.
Another solution for enjoying the dried blooms without having them shed all over the place is to buy a tall, clear, cylindrical glass vase the same diameter as the blooms and cut them off the stems. Put the first bloom upside down in the bottom of the vase and the rest of them right side up, filling to just below the top of the vase. This gives a clean, contemporary look and helps maintain their color longer.
Hey Deb, that sounds really cool…I’m gonna have to try that. Thanks for chiming in! Take care, D.
I love to dry hydrangeas, I wait till they get some burgundy color, pick them, pull all the leaves off, hang them upside down and they dry within a few days. They keep that color for a long, long time. I sale them to our local florists and to whomever wants them. They make really pretty decorations for Christmas also. Happy Gardening
Martha, great to hear from you again! We love drying hydrangeas too…so easy…and because their blooms are so big they can fill a big container in no time!!! Take care and Happy Gardening to you too!!! – Doug
This article is impressive! Everything I was looking for is right here. Thank You so so much Doug. I’ve got green ones too and I’m continually searching for drying methods but the silica gel just isn’t practical for them. And you’ve hit the nail on the head with your ‘drying in a vase of water’ because that’s how I do it! But they don’t last! 12 blooms are at the starting gate right now 👍👍👍
I cut the hydrangeas and arrange directly into a grapevine wreath. Just stick them in and pull up tight. Mine are huge so it doesn’t take many. Add more as you go to make it deluxe. After it’s completely dry and been hanging on the front door I then spray it lightly with gold flake and throw some fairy lights in for the hols
How do I keep the color when I dry blue hydrangeas ?
Hey Cynthia, thanks for reaching out with your question. I’ve never done anything to retain the color of my hydrangeas … and sometimes hints of the blue (when drying my Nikkos) would remain after just letting them dry out after sucking up all the water in the vase I placed them in … but they’re never bright blue. I have read that you can add silica gel to help retain brighter colors. Here’s a few links you might find helpful: https://gardentherapy.ca/dry-hydrangea-flowers/; https://gardentherapy.ca/dry-hydrangea-flowers/; https://plantaddicts.com/drying-hydrangeas/. Take care, D.
I just cut them and place them in a vase – no water. They dry perfect and last a long time.
I’ve never sprayed them but will give it a try.
Great info. Thank you!😊
I’ve just become interested in drying some hydrangea blooms and it is late October. Is it to late? I have quite a few that are a pretty mauve color and I’d like to put them into my Christmas tree. I may give it a try to see how it works. Thaks for the info.
Hey Sharlene, thanks for reaching out. No, I don’t think it’s too late … as long as they still have a color that you like, I’d say go for it. They’ll still likely fade some; but as long as they aren’t already brown, I think you should be good to go. Take care, D.