Our Family Vegetable Garden…In the Beginning
Our family vegetable garden story started about 4 or 5 years ago when Britt signed Brownie and me up for a “Family Vegetable Garden Workshop” at the Atlanta Botanical Gardens. We had talked for years about having a veggie garden, but like many other things we’d talked about, it had remained just that…just talk. But Britt finally took the most important step…the first one.
So Brown-Thing and I went to the workshop, joined by 4 or 5 other parent-child couplets. And it was really nice…very informative…and really just a fun time with my (then) little girl. What I thought would end with the proverbial lima bean in a cup to watch grow in the window sill…it was not. Instead I came home with 60+ soon-to-be-seedlings that we were to care for over the next 6 or so weeks before we could put them in the ground – a variety of tomatoes, peppers, squash, cucumbers, and zucchini…among others. But not only did I have to water, rotate, sing to, and then eventually “harden off” (the process of acclimating my tender indoor veggies to outdoor conditions), I had to figure out where to plant these friggin’ things that had taken over my kitchen counters and back porch! You see, our home sits on a fairly wooded lot with lots of shade – a less than ideal spot for our dreams of a prolific vegetable garden. Really, the only place that got much sun at all was at the end of our driveway.
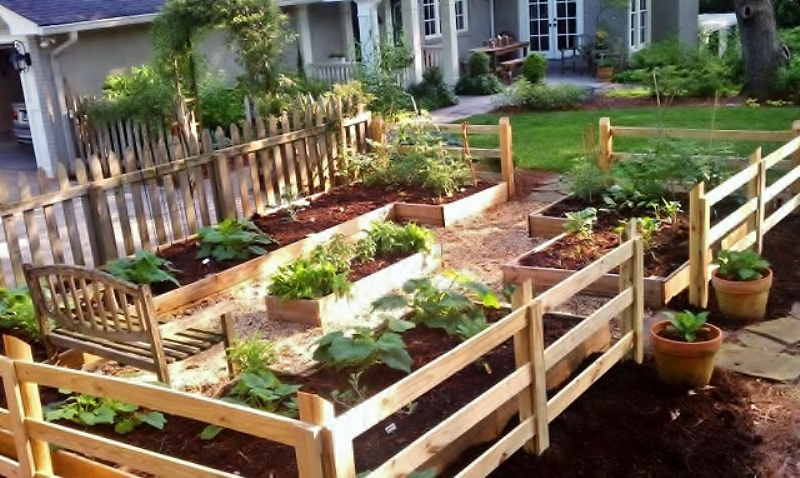
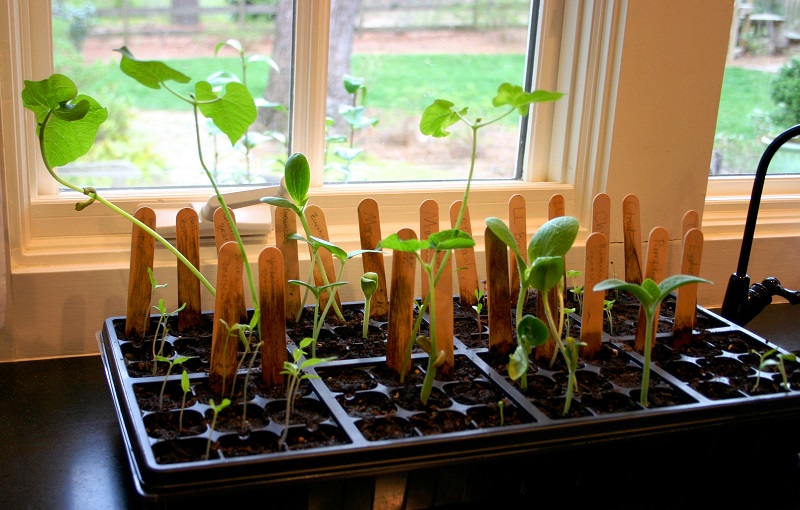 So what did I do? You guessed it…the only thing I could do with 60 vegetable babies, a hopeful wife, a brown-eyed girl and a green-eyed girl…all staring back at me with their eyes full of big green dreams – bust up the end of our driveway to provide a sunny enough home for our raised beds. And I had T-minus-5 weeks to do it!

I procrastinated for 3 of those weeks…and then I got started…to a very slow start. As is the case with many of my projects, I underestimated how much time it would take…and in this case, to break up the end of our driveway. I seriously thought that I could rent a jackhammer one lazy day after church, break up an 8’ x 25’ section of concrete…and then have my two micro-sherpa-daughters walk back and forth between the future veggie site and the creek at the opposite side of our property disposing of the crumbled up mess. I was an idiot. After about 6 hours, $250 of rental fees for several other concrete cutting/crushing tools, several bloody knuckles, and a few expletives later…I had literally chewed off only about an 8” x 3” chunk – half of which was still connected by some metal grid! So I called a buddy who worked for a landscape company whose crews were looking for something to do…and raised the white flag…I had been defeated. The next day, 90 minutes, and another $250 later my space was cleared of concrete and ready for my raised beds.
Although it took longer than I thought it would…again, no surprise, I spent the whole next weekend constructing my raised beds. Besides providing me a place to grow veggies, I had 2 other objectives when designing my raised bed area: 1. because we would see it every day, the space had to be attractive…or at least interesting to look at…in and out of season; and 2. like many other of my outdoor projects, I wanted to minimize the number of cuts I had to make. So everything was essentially based on 8’ segments…either ½ of that or a multiple of that. So with that in mind and a bunch of pressure treated lumber I went to work.
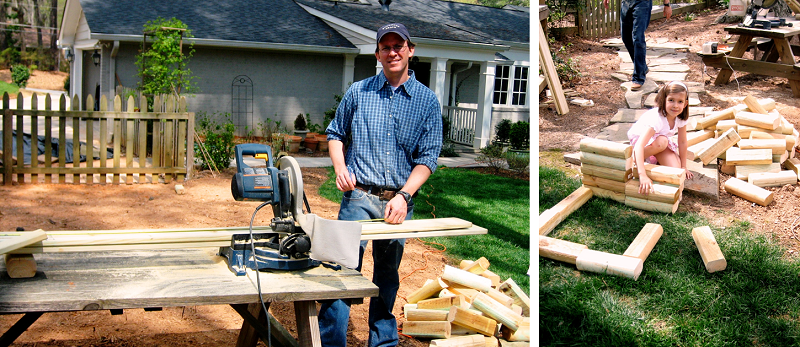 Yes, I said pressure treated…and I know, I’m probably poisoning my family…well not really…or at least, we’re all still alive. As you have or will come to learn about me, I’m not a purist in any sense of the word. It’s more important for me to do something, than worrying about all that could be or should be or could go wrong. Worrying about the type of wood for too long would likely result in my not getting a veggie garden in the ground…and again, it would remain something we just talked about. Besides, I had found at least 2 sources that suggested that “today’s” pressure treated lumber was fine to use. So I did.
Here are a few other things we’ve learned since our maiden veggie voyage:
-
- Plan for varmints: Squirrels and bunnies love fresh veggies as much or more than you do. I’ve not been ultimately successful, but some of what I’ve tried to ward off these fuzzy-tailed rats has worked. Including: some nasty spray that I think is supposed to smell like predator urine – works for a while, but after several good rains, you have to reapply; “marked my own territory” – don’t’ ask, but yes…and usually in the dark of night; and this Christmas I had 1 thing on my wish list…a pellet gun – we’ll see how well that works out. This year we are also going to try our first scarecrow and I’ve recently read to put a ball of human hair somewhere near the garden – the scent supposedly drives squirrels and bunnies away. I need to figure out what to put said ball o’hair in, but I’ll let you know how that goes.
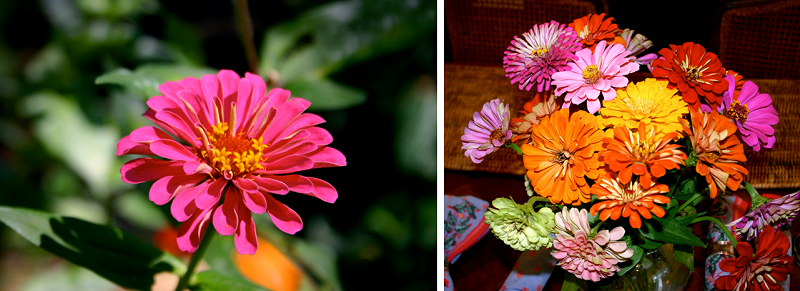
- Don’t forget about cut flowers: Britt loves to bring cut flowers inside to brighten up our home. Raised beds are a perfect place to do that too. Our favorite are Zinnias…they come in all colors and sizes…and the stems are long enough that you can cut one flower at a time without cutting off too many other buds.
-
- Attract, but don’t kill pollinators: Not only do our Zinnias look great inside our home, they also serve to attract pollinating and other beneficial insects, which = more and healthier veggies. That’s why you’ll often see marigolds planted in and around vegetable gardens…or if you’ve been to the wine country, that’s also one of the reasons why you’ll see rose bushes planted around the perimeter of vineyards. You also don’t want to kill pollinators…something we learned the hard way. A couple of years back, when we had a horrible outbreak of mosquitoes, we sprayed our entire backyard. Yes, we killed the mosquitoes, but it definitely seemed to have an adverse effect on the number of bees and butterflies (and probably other beneficial insects). Therefore, the fewer pollinators = fewer flowers…fewer flowers = fewer veggies. Mosquito abatement companies will advertise that they are “all natural”, but many studies show that it still cuts down on good insects too. So we’ve just found alternative ways to combat mosquitoes…which sometimes means just a good slap.
-
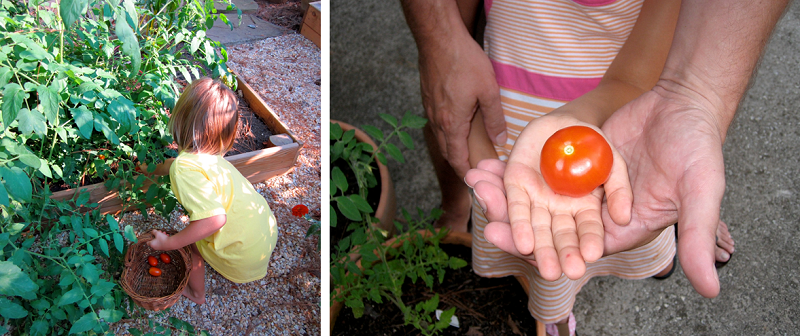
- Just do it: Don’t over-think starting a vegetable garden. Whether you have a huge spot or just a single clay pot…try it. Don’t get bogged down with all that you don’t know or should know or could know. All you need is a single plant, some dirt, and a fairly sunny spot…oh, and make sure it gets some water. You’ll learn as you go…and so will your kids. It’s amazing to watch kids not only learn where food comes from…but you may even find that your child who picks the tomatoes out of their salad will run to the garden, grab a few cherry tomatoes, throw them in their mouth and be off to play some more. Don’t let your desire to have the perfect garden get in the way of that…just get started.
 There’s a ton more that I could write and I will at some point…but this is (more than) enough for both of us right now. Close your laptop or put down your phone…and get started…you’ll be glad you did.
For those of you who have tried your hand at a vegetable garden, what pointers could you pass on to those considering doing so? Personally I’d love to learn from you as well.
You may also enjoy these posts from RYG ...
If you're not already subscribed to RYG and want to get periodic updates, links to new posts & other ground redeeming info ... just enter your email address below. Easy as that!




And think of all the new tools you get to buy!
No doubt Clark!!! Always and added bonus! – D.
I just started my addition to enlarge the garden this weekend. This is MUCH prettier than mine! I am so excited to start planting and even more so to eat fresh from the garden.
Trace: Can’t wait to hear what you’re growing this year AND more excited to see what you’ll be cooking with it! – D.
This will be our first planting season. And thank you for making me fold over laughing and then realizing I now have ground to uh, ahem redeem err ‘mark’ my ground. We are buying soil the weeknd. Any preferences? I know you say don’t over think. Pikes high grade is stuff is ~$6/ft3. We need 125+ ft3. Too much. Any other newbie pointers? Thanks!
Hey Lehr…let’s talk live. I’d do 2/3 topsoil and 1/2 compost (mushroom…or leaf compost, not cow manure)…then possibly top dress with additional compost. I think you need enough to buy it in bulk. Let’s talk…and excited to hear you’ll be enjoying your first home grown veggies! Take care, D.
This is awesome! Love your raised garden. It’s so pretty and functional!
Growing up, I remember the men in my family also “marked” around the gardens. I also remember them taking clippings from their barber shop visits and strewing them around the garden. It seemed to work pretty well.
I just love the blog. Keep up the good work!
Thanks Brandy! Yes…oh the joys of “marking your territory.” This also gives me a viable excuse to give Britt when she asks “What are you doing!!!” Well, at least one that makes her pause long enough for me to finish my gardener duty! And that’s a great idea about getting clippings from the barber shop…although with the “heeds” of hair we have in the Scott family, I could probably just clean out a brush or two every week! Thanks again my friend…appreciate your support…please continue to spread the word. Take care, D.
Doug, Don’t know if it works for squirrels & bunnies, but we use Melorganite to discourage the deer up here in the mtns. It’s a fertilizer that is mild enough not to burn up your plants in the summer. Of course it must be reapplied after a couple of rains, hence, not practical when we have a season as rainy as last year. Not only do we have lots of deer, but a bear has gotten into our fig bush, crows love our grapes (we’ve only gotten to taste 1 in 3 yrs.!) & the squirrels even dug under the bird netting Jack used to wrap the entire fig bush! SO IF YOU FIND SOMETHING THAT’S EFFECTIVE FOR ALL THESE VARMITS BE SURE TO POST IT!! WE ARE LOOKING FOR IDEAS FOR THIS YEAR! I’d love to be able to make some Fig Preserves & Grape jelly, not to mention keep my yard looking beautiful with my 25 rose bushes, my Hostas & the many other plants they seem to think make up their Salad Bar!!
Thanks ST! I have heard of Milorgranite and have used it in my shrubs and on my lawn…but not in my veggie garden. I had heard of it being used to repel deer, but not bunnies and squirrels. I’ll have to try that this year and let you know if it works. Take care, D.
Beautiful family garden! It’s so cute, not too big, not too small. We just moved to our new house and the backyard is big enough to make a vegetable garden. I love the idea of raised beds, it makes the things tidier. Thank you for sharing you experience. Greets!
Tamara…thanks so much for chiming in and your encouraging words. And I agree…raised beds to seem to make things tidier and make the space seem a bit more intentional. I’d love to see what your raised beds end up looking like…so please share. Take care and have a great weekend, D.