Our 1960s Ranch Renovation: Interiors #2 | Foyer Remodel
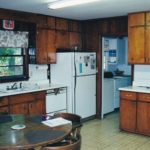
In my last post on our 1960s ranch renovation I teased you with a pic of our renovated kitchen. Well … you’re gonna have to wait to read about & see more of that transformation. Instead, we’re going start the renovation posts by bringing you through our front door and into the foyer … just like we would any first-time guest.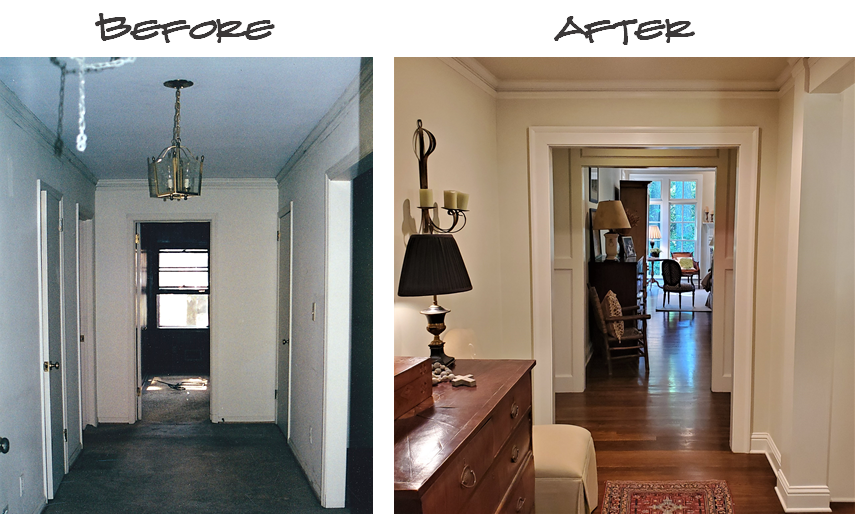
![]()
Small Room … Many Problems
Although post-renovation our family & close friends typically enter our home through the back door and into our mudroom (stay tuned for that post), others still enter through our front door and into our foyer.
And we all want that first impression to be a good one … right?
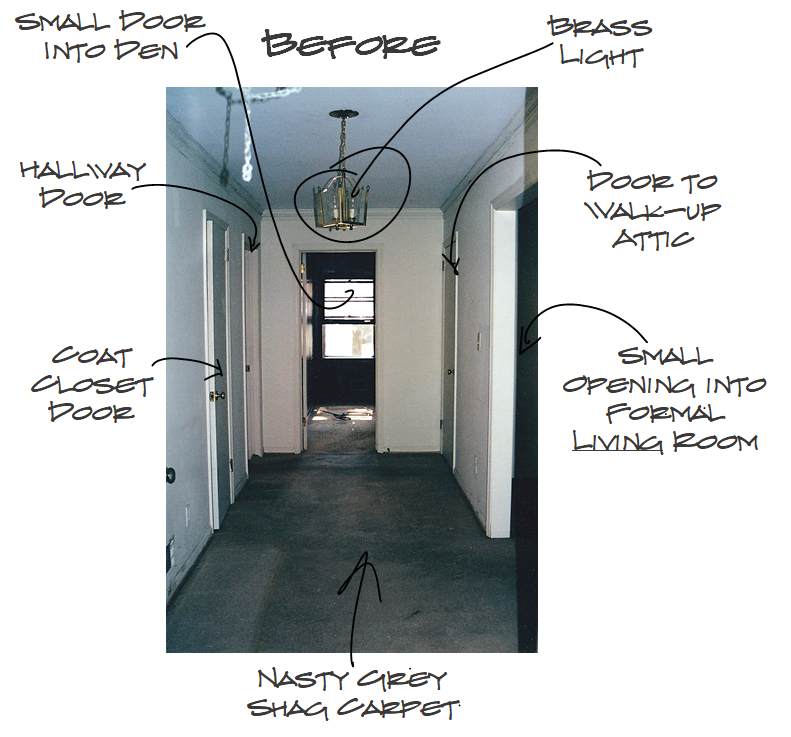
Well let me just say that the first impression our foyer initially gave was anything but good. As you can see from the diagram to the right, many of the “problem areas” were vestiges of a 1960s ranch: shag carpet, narrow passageways and doors aimed to better manage heat and A/C, a coat closet, dated light fixture, etc.
Another problem that we saw was that the foyer felt more like a glorified hallway … fairly narrow.
Structural & Cosmetic Solutions
As I mentioned on the first post about our renovation, we put lipstick on ’60s lady before moving in by painting every surface possible, ripping up the carpet, and refinishing the hardwoods. We did all that in the foyer, but the other structural & cosmetic changes would have to wait.
Five years later and with the problems outlined above in mind we worked with our architect (Steve Kemp) to come up with a more comprehensive solution. You can follow along with what we did by referencing the diagram and labeled pictures below.
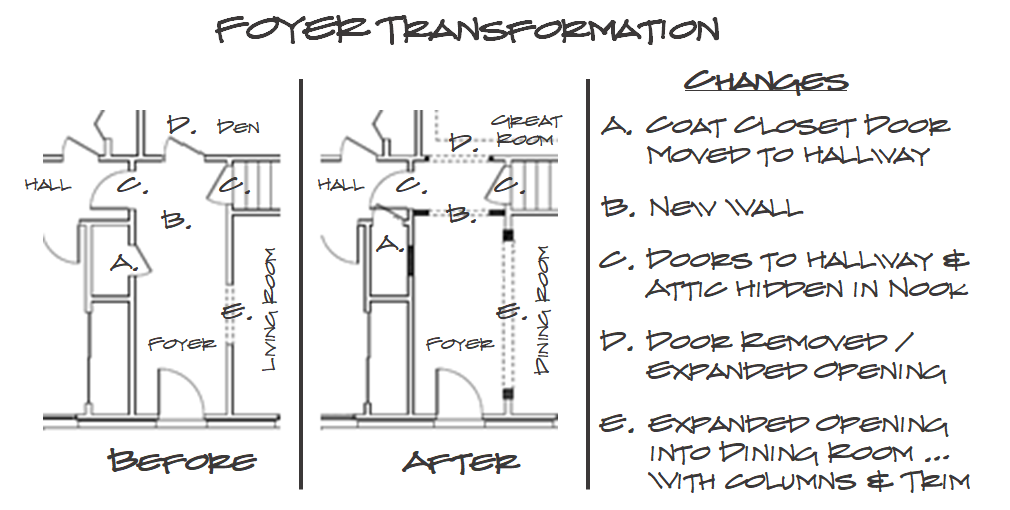
A. Relocated the Closet Door to the Hallway: Since most of our guests that “come in to stay for awhile” enter through our back door into our mudroom, we really didn’t have a need for a coat closet. What we needed more was a storage closet for miscellaneous stuff … like paper towels & TP bought in bulk … which seemed more natural to have stored off our hall. Besides, the coat closet door oddly broke up the main wall of our foyer, making it difficult to center anything there, opposite the opening into our dining room (previously our unused formal living room … see later post for the story behind flipping the dining & living rooms). Once the door was moved and the hole filled, we were good to go!
B. Created a “New Wall”: As I referenced above, our narrow foyer felt like a glorified hallway. So to give the impression that the foyer was wider we played with the proportions by adding a “wall” just before getting to the doors on the left and the right (that lead to the hallway and walk-up attic, respectively). Now that the foyer wasn’t as long it didn’t feel as narrow. And by the way, it wasn’t so much a “new wall,” but a wide passageway that still stopped your eye for a second in the foyer.

C. Hid the Doors to the Hallway & Attic: This “new wall” also created a “nook” of sorts that hid the doors to the attic and hallway … that lead to our bedrooms. This created a more appropriate distinction between “public” and “private” spaces, while leaving the foyer less cluttered. Since this “nook” was essentially a grouping of doors and passageways, we simply trimmed out the entire area to give it a “paneled” look.
D. Removed the Door & Created an Expanded Opening into the Den: Originally … to get to the den from the foyer you had to go through a small door (the size you would have for a bathroom or bedroom). This was likely done for 2 reasons: 1. to create some privacy; and probably more so, 2. to help manage heat & air.*
* Note: Prior to the late 60s homes were not typically built with central HVAC. So it made sense that our den (the main gathering room of a home in the 60s) was cut off from all other rooms by small doors. The fireplace kept it warm in the cooler months and a window AC unit kept it cool in the warmer months.
But we’re no longer living in the 1960s. So we removed the small door and expanded the opening as much as we could and centered it with the opening from the foyer (actually vice versa). This way when someone entered our front door they were able to see the foyer, then straight through into the den, and ultimately through the windows into our backyard. Remember, we’re all about bringing the outside in!
E. Expanded the Opening from the Foyer into the Dining Room: Back to trying to give the impression that the foyer was wider than it was, we expanded the opening from the foyer to the right into what is now the dining room. This allowed us to “borrow” some of the air space in the dining room and give it to the foyer. We then beefed up that opening with columns.
Final Touches
To finish things off:
- We added beefier trim throughout (really just 1x4s capped with small trim … both cheaper and closer to the look we were going for).
- Painted the walls and ceiling ** to match the other “public spaces.”
- Removed the lovely brass light fixture (which I actually painted matte black to use in our new ½ bath … stay tuned for that post) and added 2 can lights. **
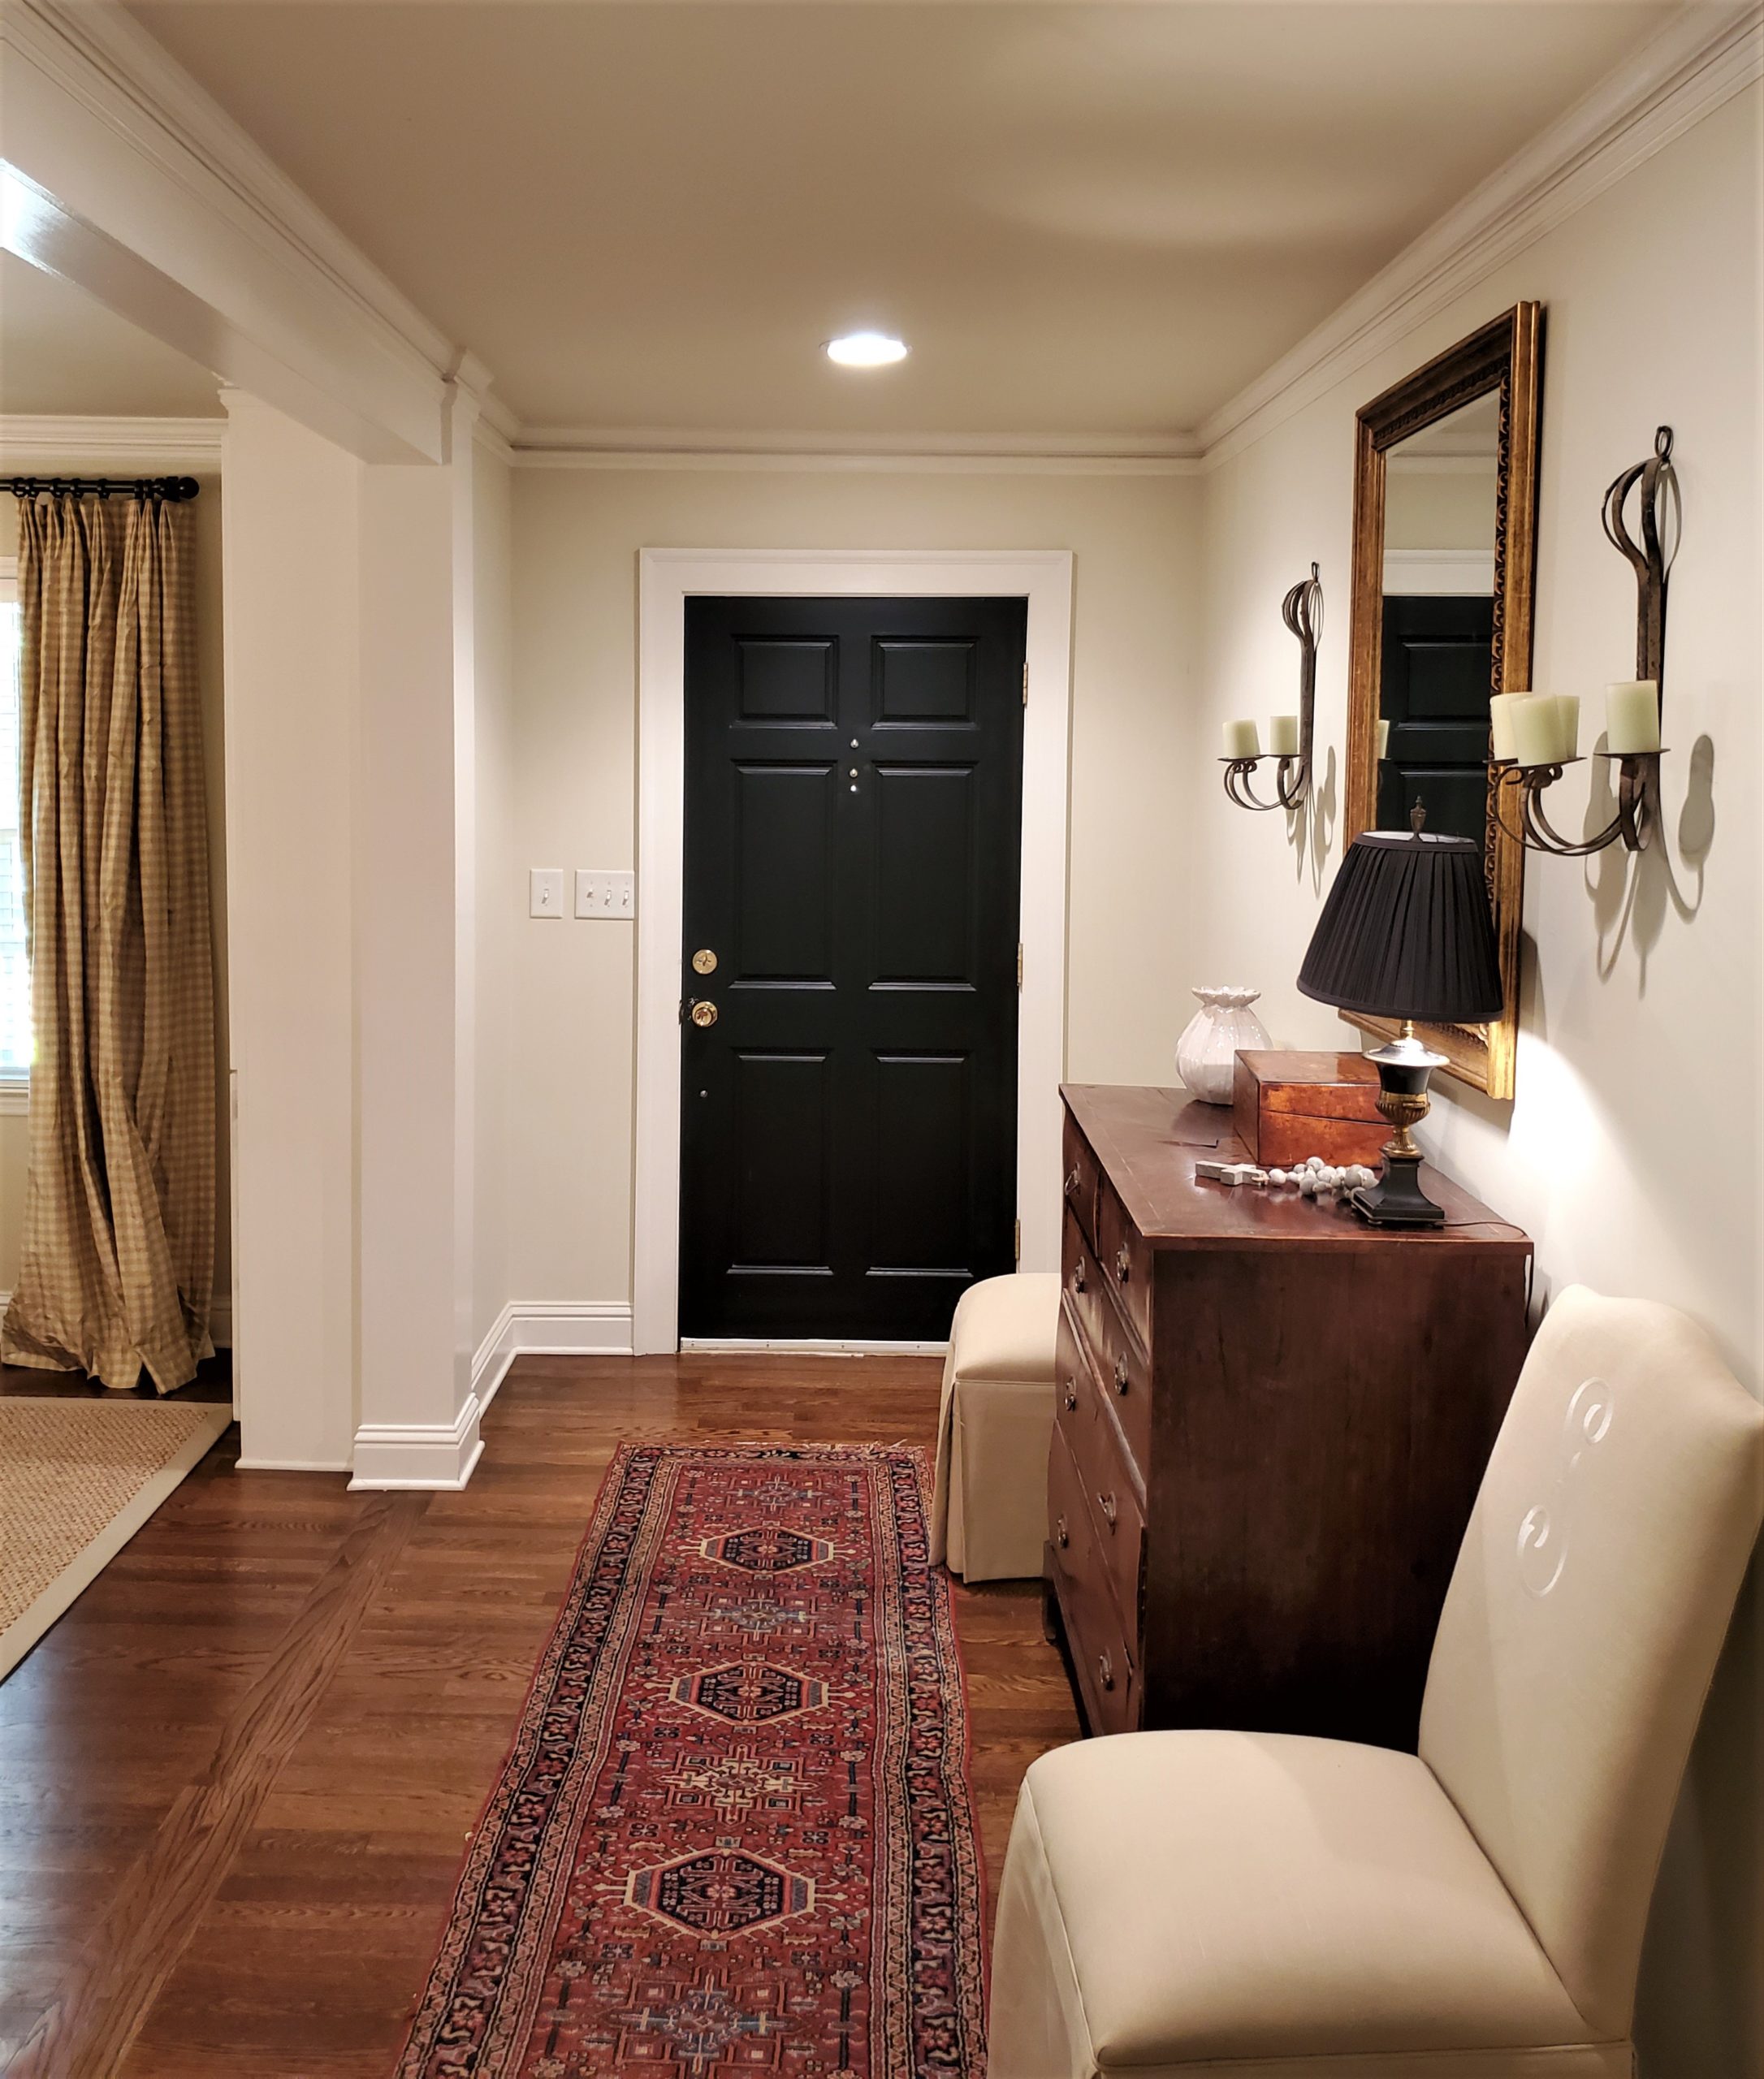
- With the main wall of the foyer unencumbered by the coat closet door, we centered an antique chest we purchased in Charleston right after we got married and added a mirror (cheap … Home Goods) above it to capture more light and to better connect the foyer visually with the dining room.
- On either side of the chest we placed our 2 extra dining room chairs that we can conveniently pull into the dining room when needed.
- Finally, we added candle sconces to complete the foyer vignette … and a few family pieces (e.g., wooden box and runner).
** We wanted to de-emphasize the 8’ ceilings (typical of ’60s ranches). So we …
- … replaced the unimpressive, hanging light fixture with flush can lights … because no matter how dinky, the light still hung down and caused you to look up to the low ceiling.
- … painted the ceiling a lighter shade of the same color that we painted the walls … giving the impression that the walls were taller than they are.
Paint Colors
If you’re curious … here are our paint colors:
- Walls: ½ formula of Richmond Gray (Benjamin Moore, HC-96, velvet finish)
- Ceiling: ¼ formula of Richmond Gray (Benjamin Moore, HC-96, velvet finish)
- Columns & Trim: Swiss Coffee (Benjamin Moore, OC-45, semi-gloss finish)
The Finished Product
I’ll leave you with some pics of how things turned out … sans the clunky labels. A few wide-shots at different angles and a couple of detailed shots of the columns & trim.
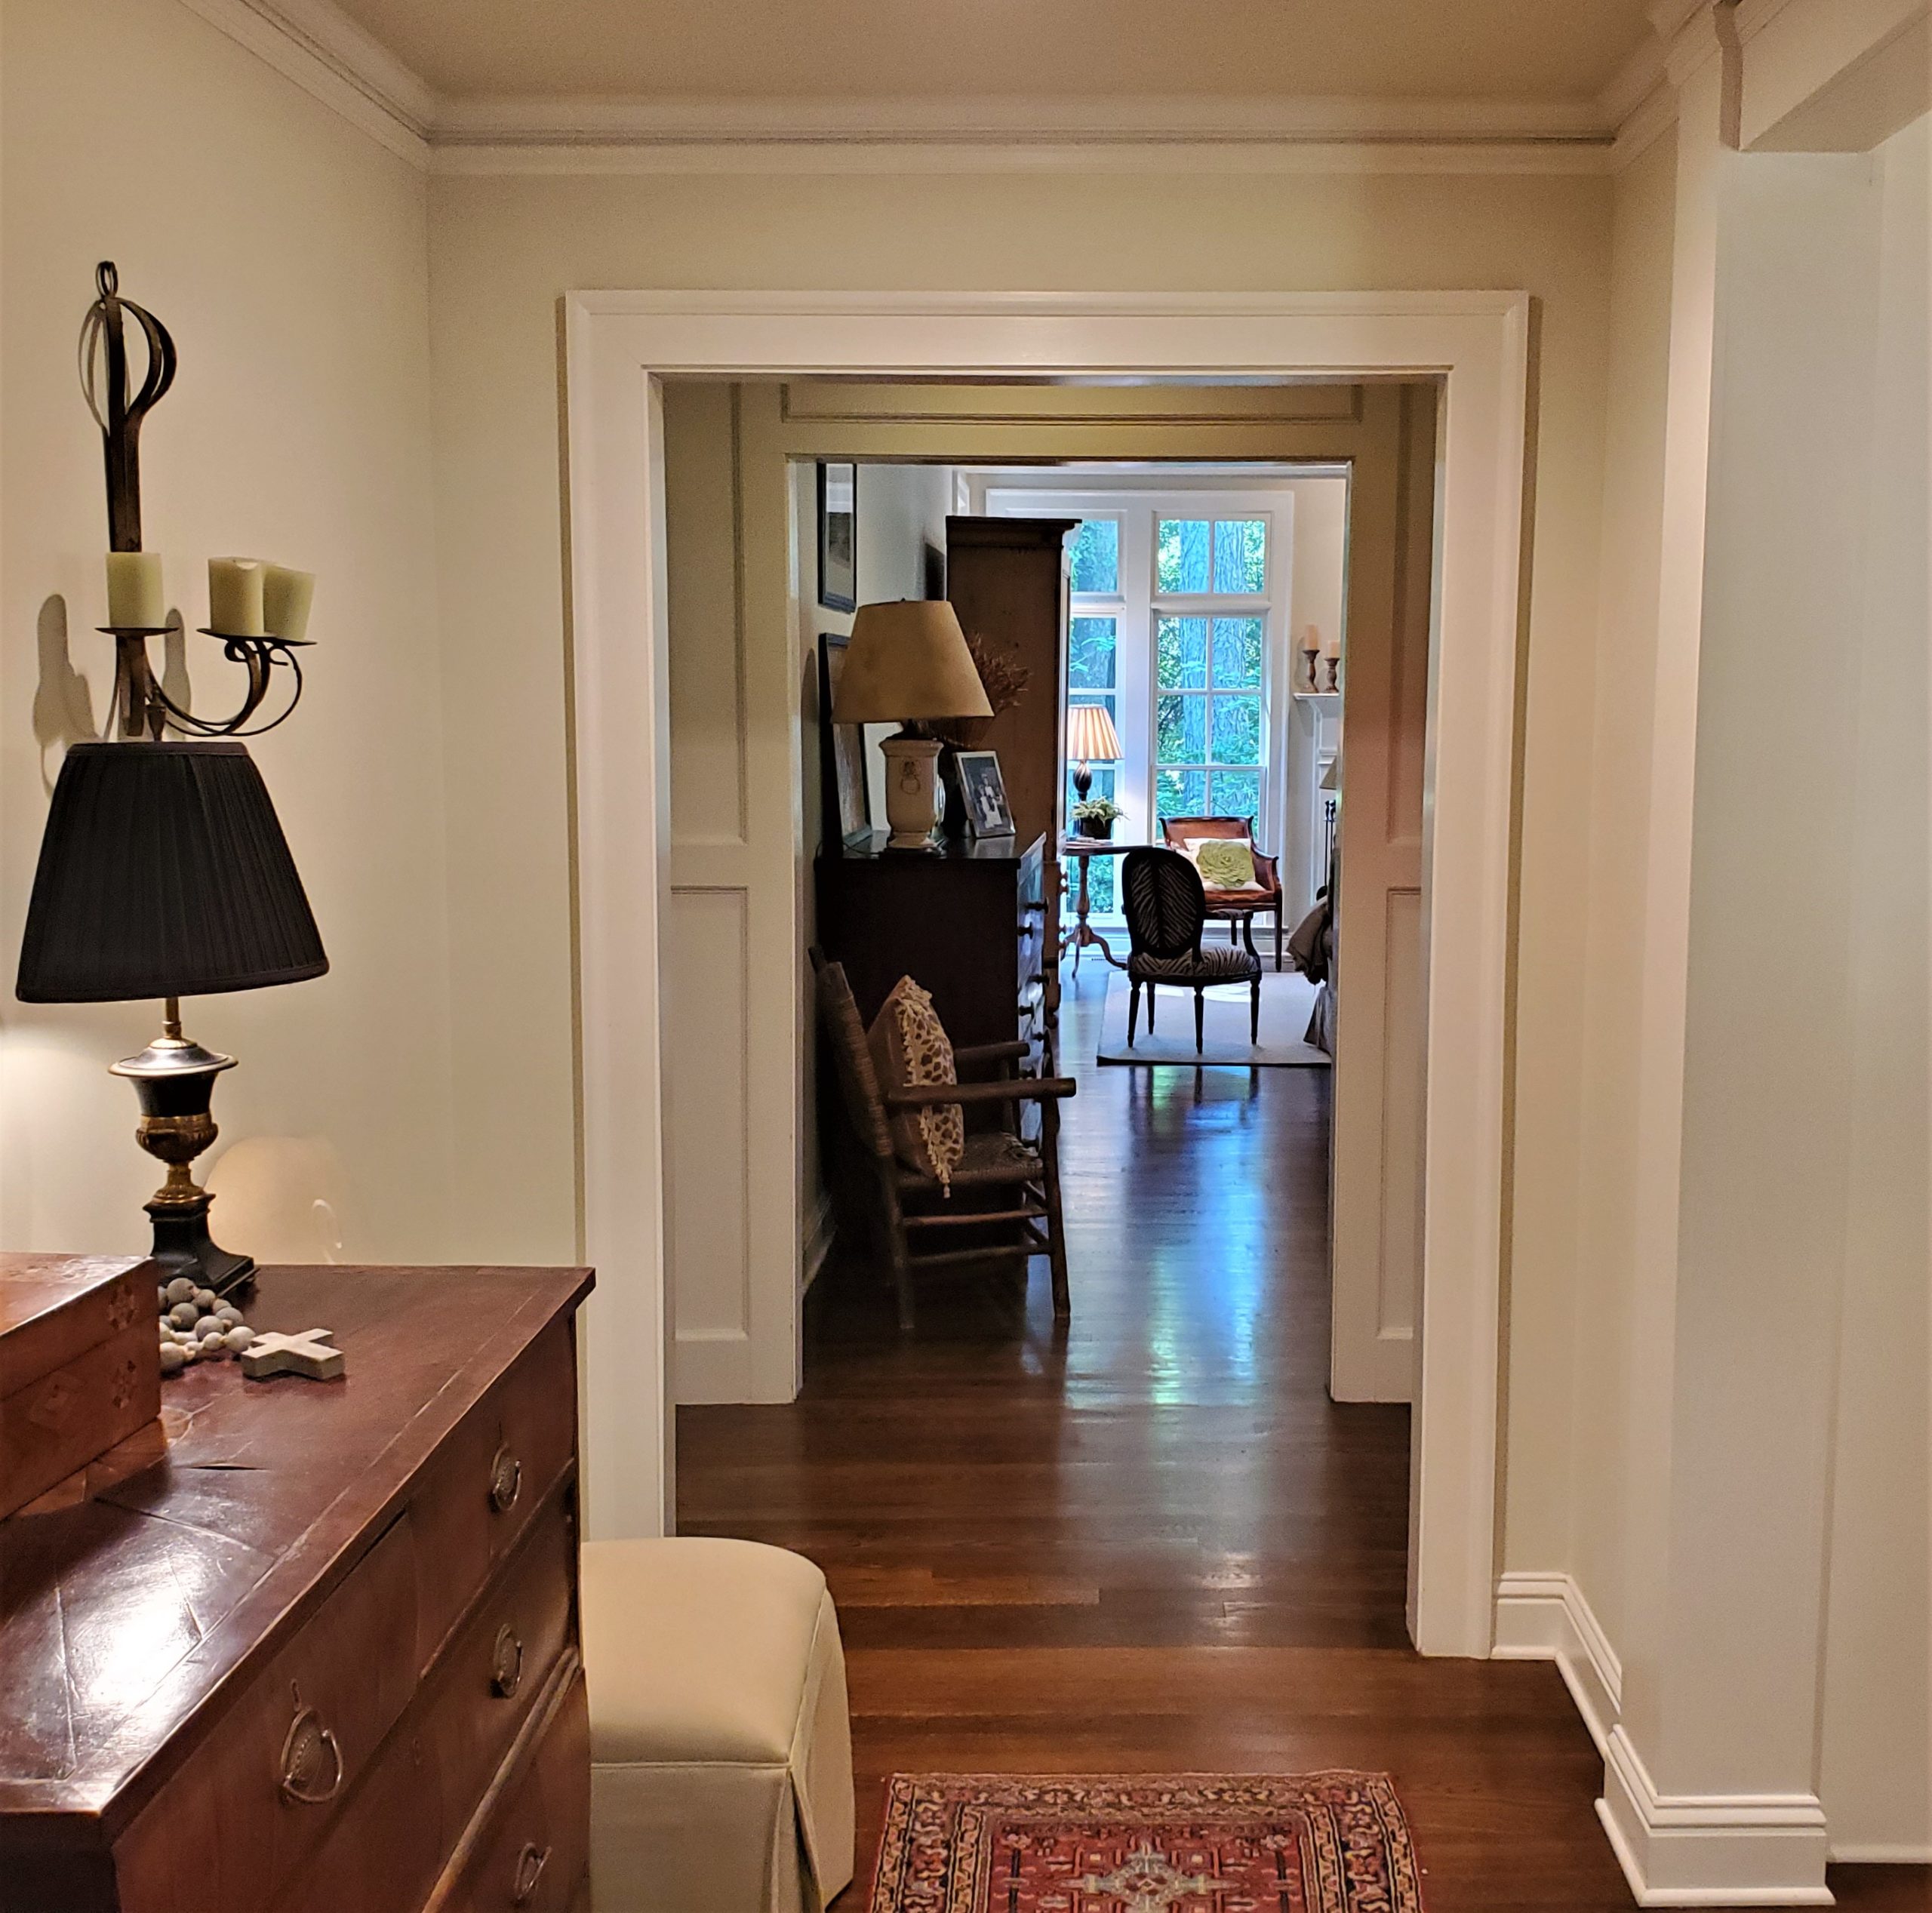
Entering the foyer from the front door.
Looking back at the front door from the “nook.”
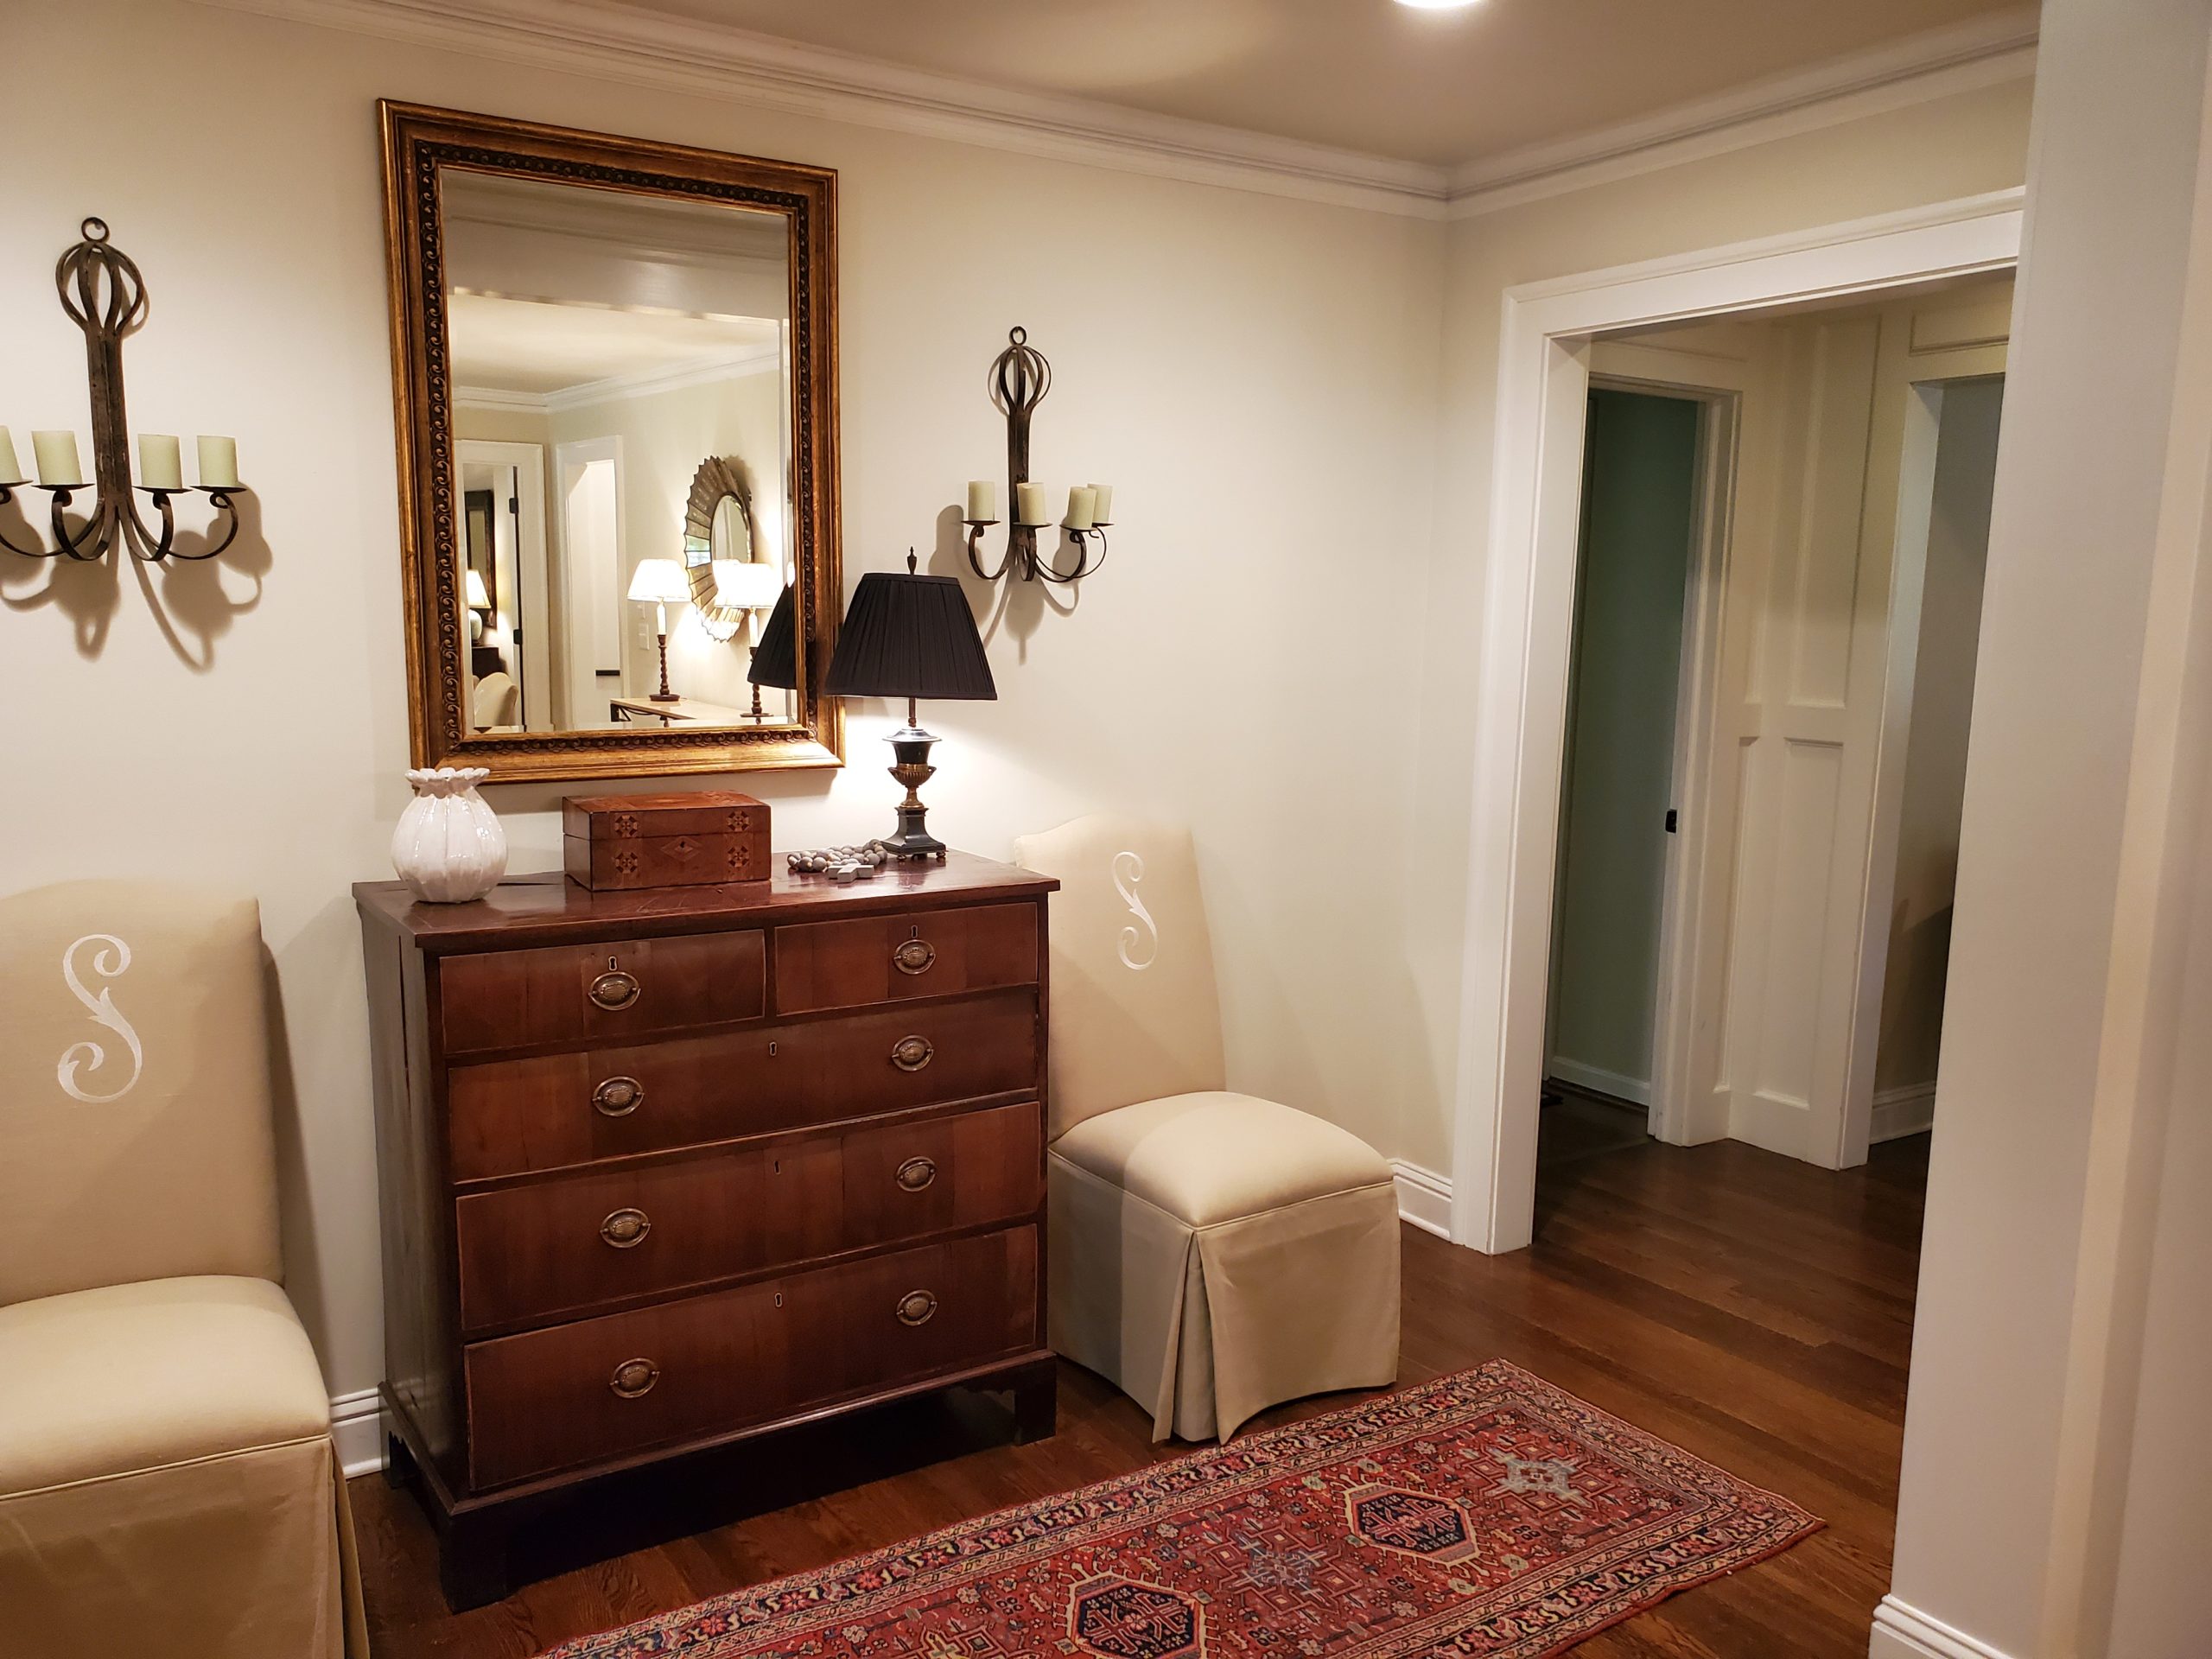
View from the Dining Room.
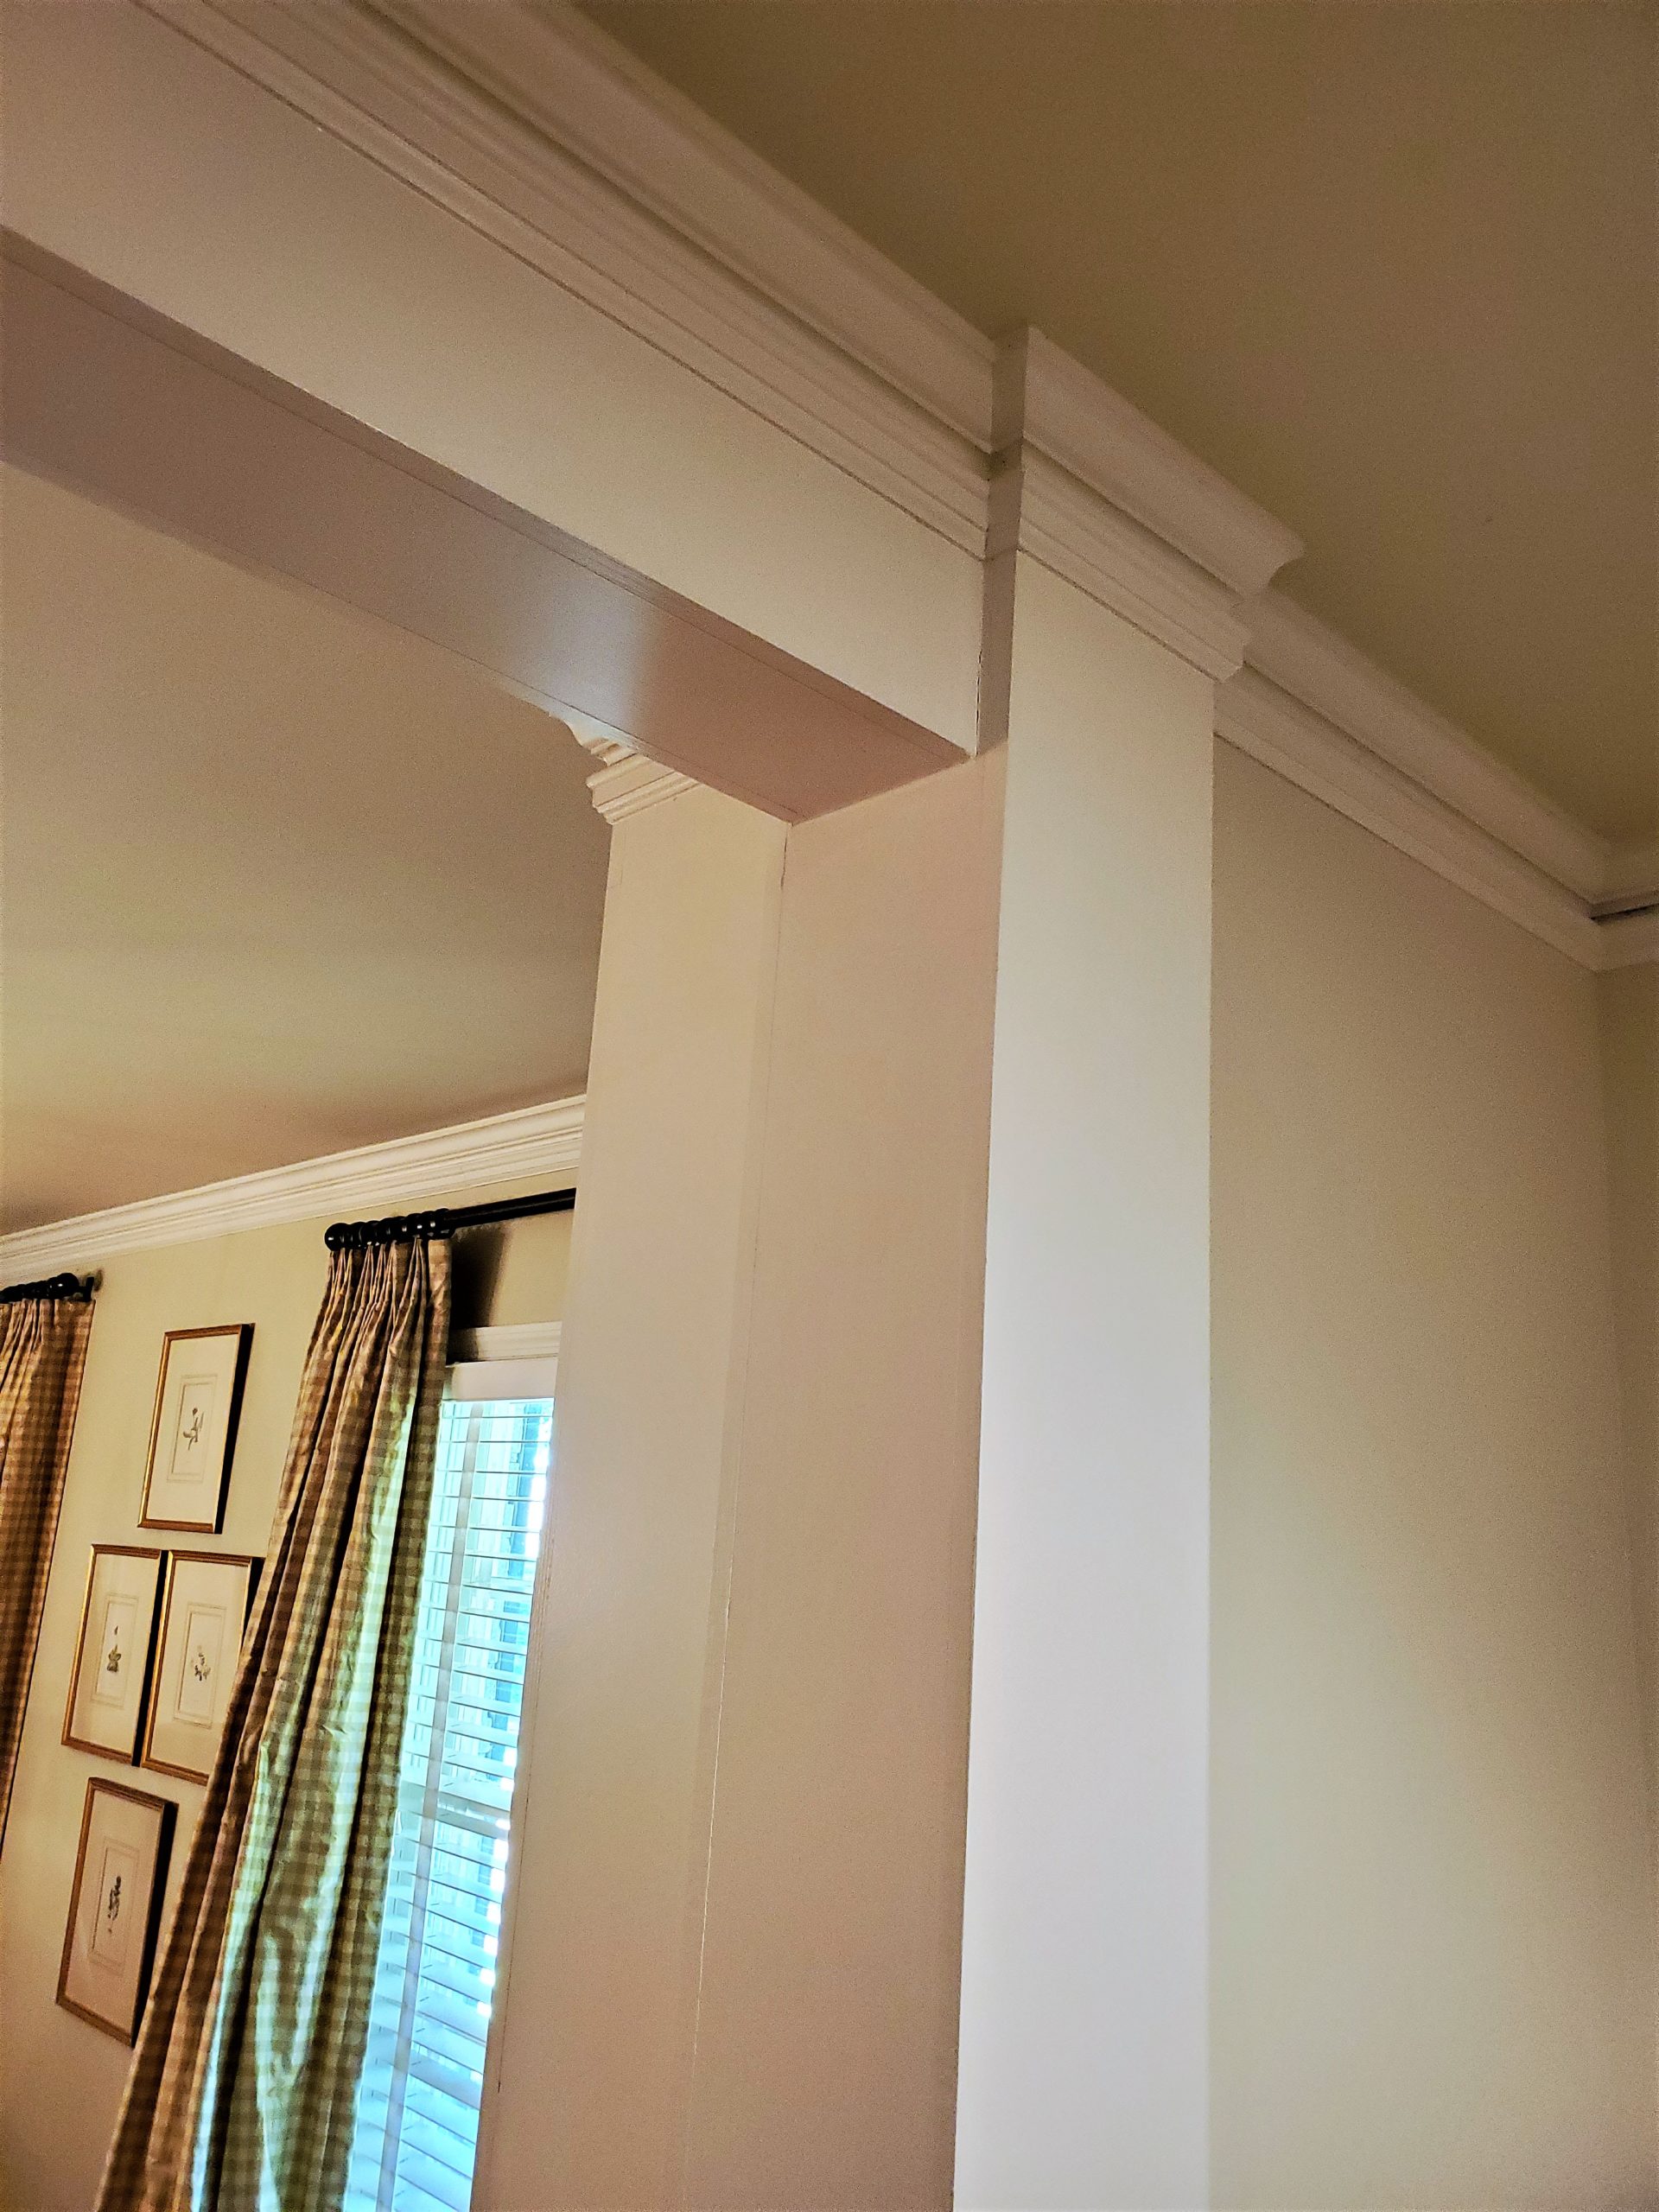
Expanded opening beefed up with columns & trim.
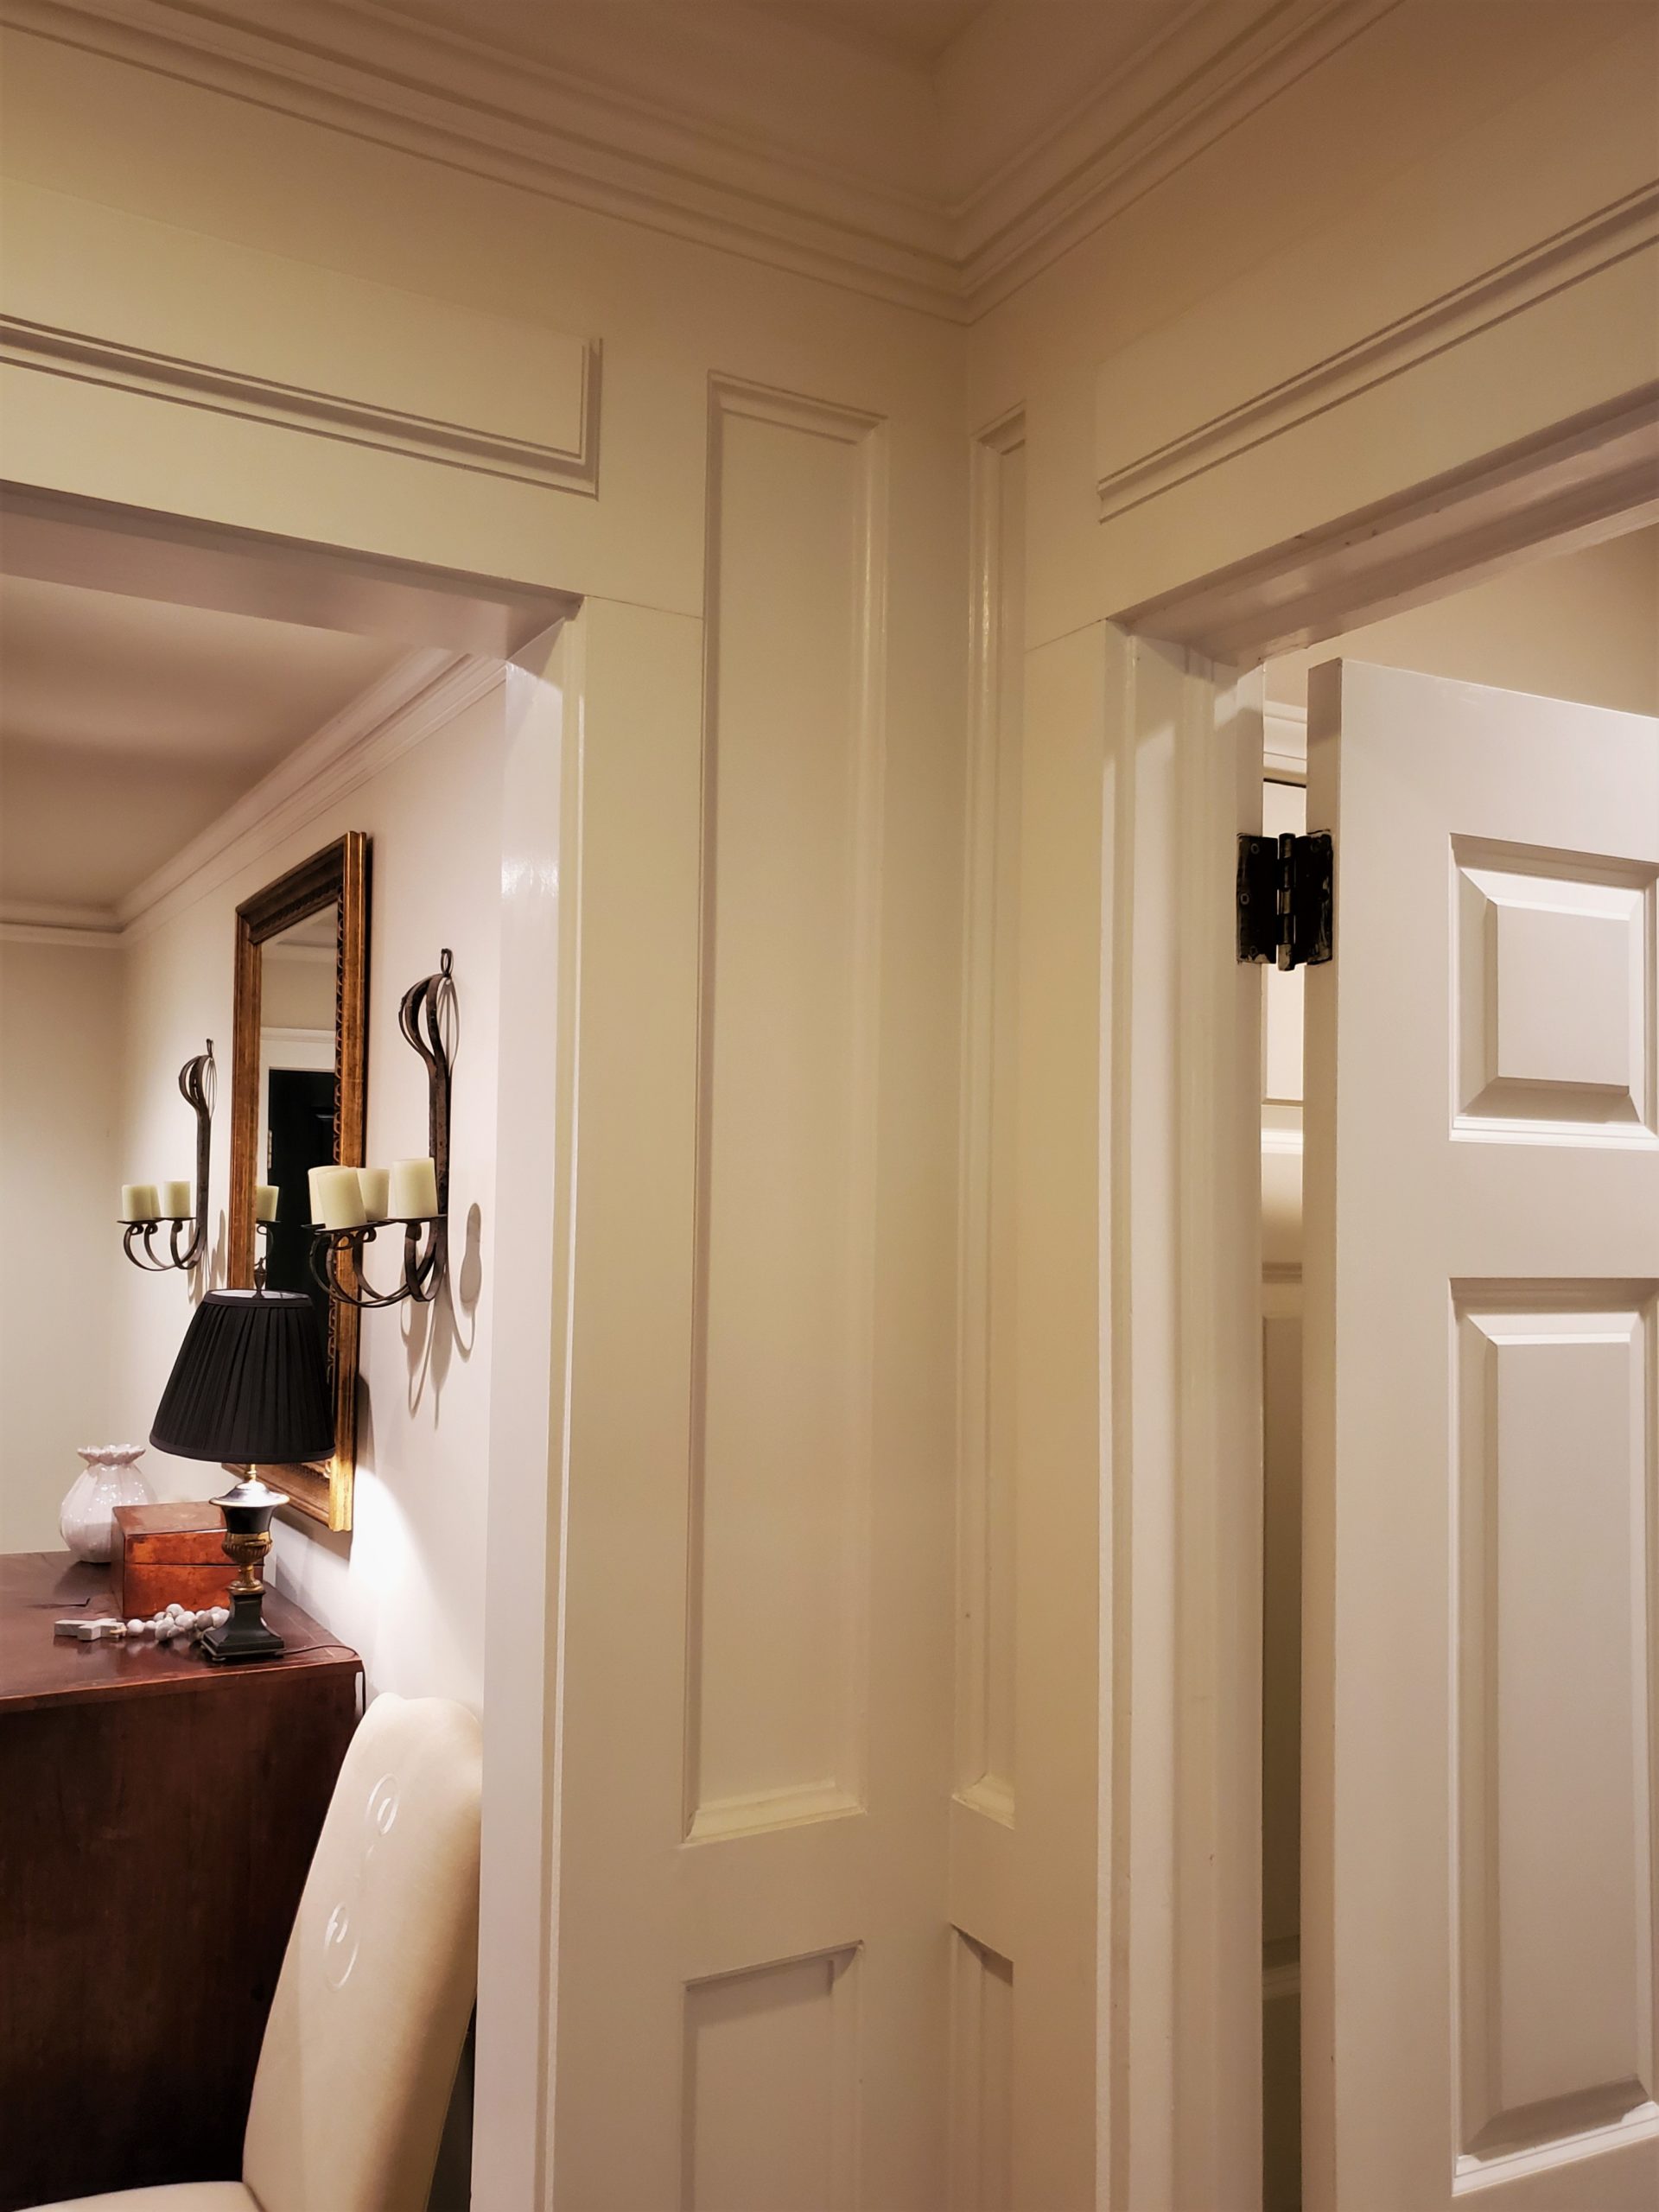
The trimmed-out/paneled “nook” that separates the foyer & great room … and hides the hallway & attic doors.
![]()
I hope that this post helps you better envision how a few small … and a few not-so-small changes … can make a big difference in transforming your 1960s ranch foyer.
If you have questions please reach out here or ask away in the comments section below. Also, please stay tuned for future posts in this series. Next up … the transformation of our small, dark den into a roomy great room with plenty of natural light!
Take care,

You may also enjoy these posts from RYG ...


If you're not already subscribed to RYG and want to get periodic updates, links to new posts & other ground redeeming info ... just enter your email address below. Easy as that!
Well, this is going to be fun! Thank you for sharing this decorating/remodeling history of your beautiful home. Can’t wait to see/read the next part.
Thanks Kim. When we did the post on what we did to the exterior/front elevation of our home we were really surprised by how many people asked to see what things looked like inside. Sooo…over the next several months we’ll work our way through … room by room. What feels strange at times is we did the renovation 14 years ago (like we moved in this week 14 years ago!)…so nothing really feels new anymore. So glad we took pictures when we first moved in so that we can be reminded how much things really have changed. Thanks again for reaching out with your encouragement. Take care, D.
How LOVELY & welcoming!!! We’re about to begin our own “redemption”. We bought a very neglected, but “has good bones” 25’x25′ cottage on 1 acre, plus lifetime access to 10 additional acres. Roughly 2 more weeks & we’ll be getting started!
Thanks so much, Cookie! And 10 acres…wow, I’m jealous! Good luck with your renovation … your home redemption! You will have an amazing story to tell … and show! Please send pics. Take care and thanks again, D.
We’re about to start redoing a 1970 ranch. These articles are SO WONDERFUL!!! Thanks for sharing your experience and wisdom!! I am trying to think through things before we start ripping into it. 🙂
Thanks so much, Leigh, for your encouraging words. Our renovation was a labor of love … and still is! Good luck and send pics! Take care, D.