How to Make a Driftwood Candle Holder
Last summer Doug and I found a really cool piece of driftwood that had washed up on shore at my parents’ lake house. It was a really interesting piece of wood…with its unique curves and beautiful grayed, smooth texture. Given that we found it at my parents’ lake house I knew right away that I wanted to turn it into some sort of gift for them. But…as with many of our other projects, it got pushed aside and forgotten…until we rediscovered it just before Father’s Day this year. We toyed with the idea of making it into a driftwood coat rack, but couldn’t quite figure out how to hang it on the wall without it being too wonky. So we landed on making it into a driftwood candle holder…something both unique and very personal. Not only that, it matches my parents’ rustic decor at the lake…and goes along with Doug’s and my bent toward trying to blend indoor and outdoor spaces whenever possible.
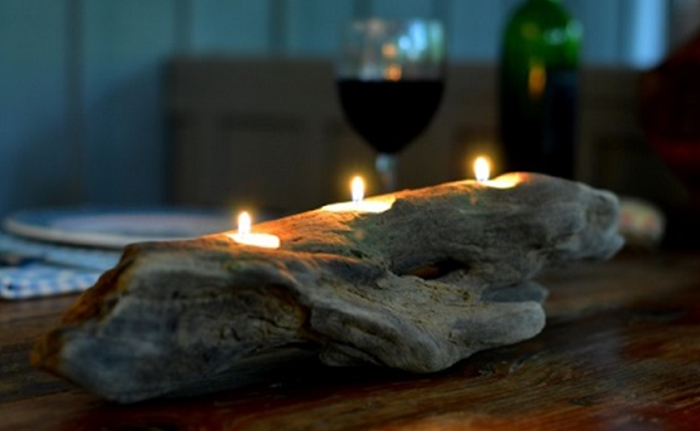
We were so thrilled with how super-easy it was to make and how awesome it turned out…if I do say so myself, that we had to share it with our fellow DIY ground redeemers. One really cool thing about this project is that there is really no creativity gene required…since the beauty lies in any piece of wood that you might find at the river, lake or beach. All you need to be able to do is measure…kinda, and manage a drill. If you can do that, you can handle this project…very easily!
What You’ll Need
-
- Piece of driftwood
- Desired number of candles
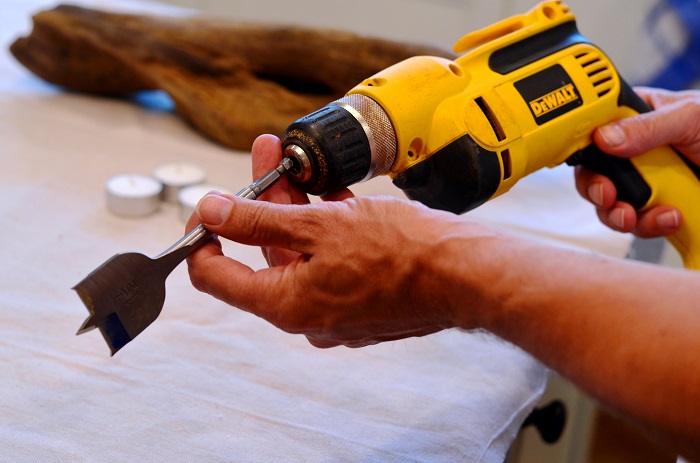
- Drill and appropriately sized drill bit (we used a 1.5″ bit for our votive candles)
How to Make Your Driftwood Candle Holder
-
- After brushing off the sand, we first decided how we wanted it to sit on the table…determining which side served as the most stable “base”, while leaving the more interesting side on top.
- Then we decided how many votive candles we thought would look best. We generally do things in odd numbers…so after playing with configurations of 5 and 3 we determined that 3 was perfect given the size of our piece of wood.
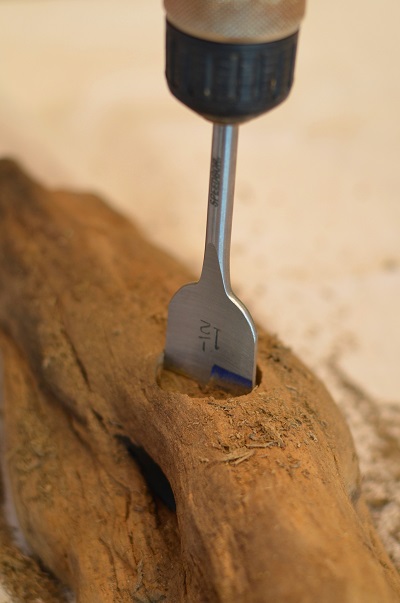 We then marked the center of the wood and drilled a hole there…well, it was basically center since we weren’t dealing with a perfectly proportional object. Also, because it wasn’t flat, it helped having 2 sets of hands…I held the driftwood while Doug managed the drill. We stopped occasionally to check the depth of the hole…wanting the top of the candle to lay as flush with the top of the wood as possible – not wanting the hole to be too shallow or too deep.
- Then, as a starting point for the position of the other 2 candles, we measured and marked a spot on either side of the center candle. But then…to take into consideration the natural curves of the wood, we moved the spots around just a bit to make sure that the candles would be positioned so that they wouldn’t lay at too much of an angle.
- Then…as we did with the first, I held the driftwood while Doug drilled the other 2 holes.
- Once all 3 holes were drilled, all we had to do was blow away the sawdust and drop the candles into place. (By the way, we chose to take the silver casing off the candles to keep it more natural looking.)
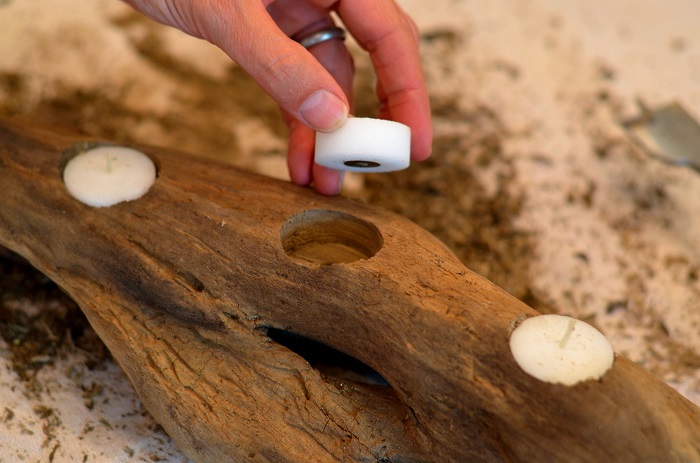
It’s that easy! It took essentially no time…and as I mentioned before, the beauty and creativity is really handled by the wood itself. So really no creativity is needed for those of you who consider yourself craft-challenged….just some measuring, a drill and a steady hand…and you’ve got a personalized work of art that can grace your dinner table, shelf, mantle or any spot you want to add a bit of interest and warm glow.
By the way, we brought our driftwood candle holder to the lake this past weekend to give to my dad at our belated Father’s Day festivities…and he loved it! It was a beautiful and memorable centerpiece for our dinner celebrating my amazing dad and the lake that he loves and shares with us year after year!
Take care,

You may also enjoy these posts from RYG ...
If you're not already subscribed to RYG and want to get periodic updates, links to new posts & other ground redeeming info ... just enter your email address below. Easy as that!


![How to Hang String Lights [Video with Exmark]](https://redeemyourground.com/wp-content/uploads/2015/06/4th-of-July_String-lights-_-RYGblog-150x150.jpg)


Thanks! I like this idea a lot. It reminds me of when we used to do something similar for Christmas. We drilled 3 holes in a 12-18 inch long ~5 inch diameter bark-free log to hold tall red candles, varnished the wood, and draped greenery around it. You wouldn’t want a shiny varnish on something like your driftwood, but a non-gloss polyurethane might help preserve it and prevent it from soaking up anything that got splashed on it. I’m not sure what it would do to the color, so I would test it on the underside first.
Mark: VERY cool derivation of this driftwood candle holder. We’ll have to remember that this fall! Thanks for sharing my friend! Take care, D.
I’m so trying this . . . . as soon as I find some driftwood.
Leigh: You ARE the best at trying things like this out…e.g., your AMAZING burlap wreath! This is so easy to do…really only takes a few minutes…and I think the end product is cool. Britt even mentioned that if y’all happened to have a piece of driftwood from OTA House, that could be a cool gift for your parents…or from their house in SkinnyAtlas. As you did w the wreath, please share pics if you end up trying this on your own. Take care, D.
Can’t wait to collect some driftwood this weekend and get started on this fun project. LOVE this idea! Know your Dad so appreciated this very thoughtful gift. You guys are the best gift givers!!! Great post!
Britt’s really the gift-minded-giver…I’m just the guy with the tools…but it does work out well for us…and I guess whomever gets the gifts Britt dreams up. I can certainly see y’all doing this with some driftwood you find near your home! Please share pics if you end up making one of your own. The cool thing about this project is that every creation will be so unique. Take care my friend, D.
[…] 6. Driftwood Candle Holder Centerpiece […]
[…] more ideas, check out these unique driftwood candle holder ideas or follow these DIY steps for guidance. Incorporating driftwood candle holders in your space can create a cozy and inviting […]