Top 10 Landscape Design Tips (Part 2 of 2)
Last week I laid out the first five of my Top 10 Landscape Design Tips … and today I’ll finish up with the other five. As I concluded last time, if you want more details on a specific point, let me know and I’ll focus a future post on just that topic. So here are my other five landscape design tips…
![]()
6. Allow the style and lines/features of your home to direct your design.
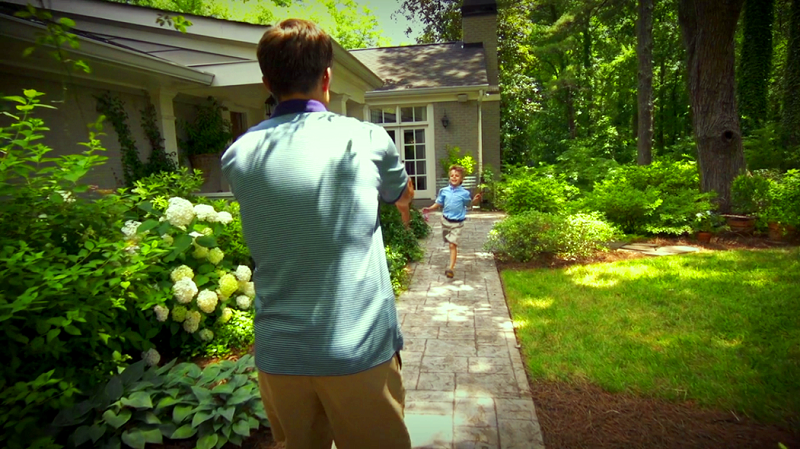
Again, this may seem obvious to some…but it really seems to be a challenge for others. What I mean by this is…if you’re looking to extend your home outside…beyond its walls, you need to consider what your home is already “saying.” In other words, if the design of your home is more formal, so should your yard; if it’s more whimsical, so should your yard. That’s not to say you can’t be creative or push the envelope a bit (particularly in the back yard)…but the overall look and feel of your yard should be an extension of your home…not a significant departure.
When deciding where to place planting beds, plants, or hardscapes…whether immediately against your home or out in your yard, you should first look to see where the strong lines of your home are, as well as what your primary views are. For example: don’t just randomly start/stop your patio along the exterior wall of your home…do so where there’s already a corner or look up and see where your eave stops; don’t place a large plant in the center of a bed immediately in front of a window, blocking your view…but put it to the side; but do place a larger or featured plant in the center of the window’s view if it’s away from your home so that you have something strong, beautiful, or interesting to look at.
And this may be getting beyond this post, but if you are in the design phase of your home or if you have the budget to add some hardscapes to your yard, you should consider literally extending your home’s walls outside or including features in your yard that you already have in your home. For example:
-
- Use the same or similar light fixtures and hardware outside.
- If you have window boxes or large planters on your porch or near your home, place complementary planters with the same plants at the entrance of a path or near other hardscapes in your yard.
- Particularly if you have a stone or brick house…instead of stopping the exterior walls of your home on the side or at the back of your home, extend them down to create the beginning of your fence and then add pillars made of the same material to continue the fence or to form a patio. Similarly, you could construct your mailbox or an outbuilding out of the same materials. Doing so will not only make for a more cohesive design, it will also “invite you outside” more often.
Too often the design of your home and the design of your yard are done independent of the other. By bringing these design efforts together you will optimize the value and your enjoyment of both.
7. For plant material, think in terms of texture, layers & drifts.
I could write an entire post on making sure you choose the “right plant for the right space,” but I’m going to assume that you are at least looking at the labels of your plants and making sure that you are giving the plants enough room to grow…up and out, and that you are planting them in a place where they will have the right growing conditions (e.g., sun, soil, water). Beyond that, from a design perspective, you should also think in terms of texture, layers, and drifts.
When I say texture, you can simply think of the size, “finish”, or style of leaf. There are two general rules of thumb here:
-
- You don’t want to have a 1-note yard or planting bed…go for greater variety, using varying colors, sizes and styles. For instance, you don’t want to have a bed of just large, vertical leafed plants…like hosta and cast iron plants. Instead, compliment these textures with some ferns, hellebores, and camellias.
- Plants with smaller leaves and finer textures are appreciated more when they are closer to your home or along paths/structures where you will be seeing them up-close (e.g., boxwoods, creeping jenny, annuals, etc.). Whereas plants with larger leaves & structures are appreciated more from a distance.
As for layers, think of your landscape beds in terms of a painting…where you have a background, middle ground, and foreground. The plants in the background should be higher and typically evergreen…particularly when up against the foundation of your home. Plants in the middle ground should be lower in height when mature than the background plants. This is also where you can have perennials, since when they are not in bloom or leafed out you will look right past them to your evergreen background plants. Lastly, your foreground is where you will plant your smallest plants and where you can add a bit of color or other interest. These can be annuals, perennials or an evergreen groundcover. Each layer helps transition to the next.
Clearly, when purchasing plants you have to think in terms of single units, but when planting plants think in terms of drifts or groupings of plants. In other words, when placing your plants, don’t “put this plant here and that plant there…and these 5 plants in a row here”; rather, place the same 5 plants in a way so that when they have matured they are a single drift of plants. Make sense?
8. Don’t go overboard with specimen plants & don’t be tempted by the plant impulse buy!
I’ve been to some homes where I’m left a bit confused…not knowing exactly where to look or where to go. There’s a fancy plant here and a fancy tree there…3 feet away…and watch out, there’s another and another. This often happens when the home owner is a true plant freak or they’re the type who sees a plant that they’ve “just got to have”…so they buy it and throw it into the ground (i.e., plant impulse buy).
Unfortunately when you do that…when you have too many specimen plants (i.e., “fancy plants” that are typically grown by themselves and for more ornamental value), you actually not only take away from the beauty of the given specimen, but you create a very distracting space. Instead, with specimen plants “less is definitely more”…so chose a few to provide visual interest and focus to your landscape and use all the other plantings to draw your eye to them.
9. Pick a palette & stick with it.
This is really an extension of Tip #8. In order to highlight those plants you want to show off, as well as direct your eye or your visitors to specific features in your landscape, you need to have a good deal of plant material that plays more of a supporting role. Otherwise your eyes will be bouncing all over the place and your visitors won’t really know where to go.
Therefore, before completing your design you should pick a palette and try to adhere to it as best you can…given the plants you have to choose from in the varying growing conditions of your yard. What I mean by palette is a range of colors/hues of green that you use throughout your yard that will serve to unify your outdoor spaces.
Again, this allows your specimen plants and other features in your landscape to stick-out, while providing a calming, unifying effect elsewhere. Thinking in terms of drifts will help you do this.
In my yard, I made it really easy on myself and simply chose one plant that I use as my background/foundation plant througout…the Mrs. G. G. Gerbing Azalea.
10. Recognize that storage is a requirement…but it doesn’t have to be ugly.
 Finally, my last tip is to recognize that storage is a requirement for your landscape design…don’t forget about it and don’t minimize it’s importance.
If you create a great fire pit way out in your yard, but you don’t have all the wood and fire-making supplies nearby…guess what, you’ll find yourself using it less and less.
If you have a great vegetable garden, but all your tools and supplies are on the opposite side of the yard, guess what…gardening will end up being a pain and you’ll more likely stop gardening altogether.
Or if your kids love to play outside with all their large plastic toys…your yard will either look like the set of Sanford & Son or you’ll be spending an inordinate amount of time getting things out and picking things up. So accept storage as a reality and simply work it into your design.
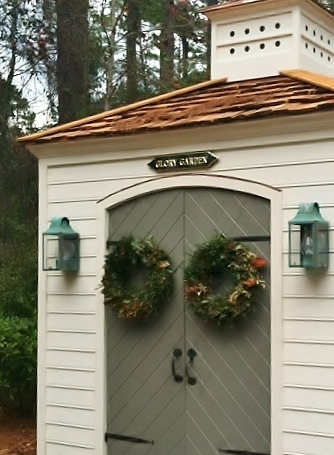
But in doing so, don’t think you’re limited to some hideous plastic or metal shed. Storage solutions can be both attractive and functional. In fact, many storage solutions can be an interesting architectural feature that grounds a space. If you don’t believe me, check out this post from a few months back on a beautiful potting shed.
![]()
So there you have it, the last five of my Top 10 Landscape Design Tips. I hope you’ve found them helpful. Here’s a quick run-down for you:
-
- Make a list of what do you want to do outside…an unedited, un-abbreviated list.
- Take out a piece of paper and a pencil and start drawing “blobs” where do you want to do these things (those things that are a priority and within your basic “reality”).
- Think about what you want to see outside from inside your home…and scribble that on your paper.
- Think about what you want to highlight…or hide in your yard (…and remember, for the front it’s typically from the street & for the back it’s from the perspective of your back door/windows.)
- Have a general plan in mind – start costing things out and determine if you just want to do one project “blob” at a time or the entire enchilada.
- Allow the style and lines/features of your home direct your design.
- For plant material, think in terms of texture, layers & drifts.
- Specimen plants are just that, specimens…don’t go overboard & don’t be tempted by the plant impulse buy!
- Pick a palette & stick with it.
- Recognize that storage is a requirement…but it doesn’t have to be ugly.
Again, please let me know if you want to know more about any of these tips…I’d love to help you move forward in redeeming your ground!
Take care,

You may also enjoy these posts from RYG ...

![[EXCITING NEWS] Apartment Therapy & RYGblog](https://redeemyourground.com/wp-content/uploads/2015/07/Apartment-Therapy-RYGblog2-150x150.png)


If you're not already subscribed to RYG and want to get periodic updates, links to new posts & other ground redeeming info ... just enter your email address below. Easy as that!
I loved reading this week’s blog post. Each week I learn so much. Thank you for suggesting the Blue Pacific Juniper for our side yard. We just got through planting them and they look great. Can hardly wait for them to fill in. We would like to place a tree in the middle of the juniper. We were think of a Japanese Maple. Would that work? Helen
Helen – Thanks so much for your comment and your very encouraging words. I’m so glad you’re happy with your Blue Pacific Junipers. To tell you the truth I’m not a huge fan of Junipers in general; however, given their low and spreading habit they are often the best choice for certain spots in your yard…particularly on slopes where erosion is an issue. As for using a Japanese Maple…they are one of my favorite specimen trees. There are few plants or trees that offer such dramatic beauty and elegance…particularly in spring & fall when their leaves are on display. I really love them to when they have no leaves – their sprawling branches and smooth bark add such great texture to any landscape. I can’t remember specifically where you plan on putting this Japanese Maple…but if they have the following growing conditions and room to grow (depends on species) you should be fine: dappled or afternoon shade (especially when you first plant them); protection from strong wind and late spring frosts; well-drained, but consistently moist soil. Good luck Helen, and I look forward to hearing how everything looks! Take care, D.
Doug,
I really appreciate your comment on integrating the outdoor spaces with the lines and rooms of the home. As an architect, the most successful projects come from a seamless integration of natural and built forms. This takes collaboration of architect, interior designer and landscape designer during the design process. I love when the home extends out into the yard with walls and other hardscape features while the soft plant material comes up to, and even into the home. We focus on blurring the lines between interior and exterior spaces and you are right on point with this article.
Agreed my friend…we are clearly on the same page here…just looking from different sides of the window so to speak. It’s crazy that it’s the norm that interior and exterior spaces are not thought of at the same time. Unfortunate really. Thanks Steve! Take care, D.
These are some great tips that can really make a difference to a home!