Top 10 Tips for Landscape Design (Part 1 of 2)
Greetings fellow Ground Redeemers! If your weather is as amazing as it is here in Atlanta, I’m certain you’re itching to get outside to enjoy your day…or to get some of the projects off your list so that you can enjoy the outdoors even more in the days to come. If one of those projects is to figure out a better design for your yard, you’re in luck. Today’s post is going to give you a quick run-down of the first five of my Top 10 Landscape Design Tips. Next week I’ll provide you with the other five.
1. What do you want to do outside?
This may seem too obvious of a question, but it’s always my starting point with any project – for me or a client. Simply make a list of all those things you’d like to do outside…not what your neighbors have done or what you think you’re supposed to do outside…but what YOU and YOUR family want to do outside that will support how YOU want to live.
On your first pass, don’t worry about reality – e.g., size of yard, condition or growing conditions of your yard, your budget…just make a list of all your dreams.
After you make your list, simply do a quick pass and highlight those things that are most important to you. Lastly, go back through one more time and put a star by those things you think fit your “reality”.
Doing this will help you prioritize your projects. Keep your list handy and refer back to it from time to time…and only cross out those things you’ve completed or determined that you don’t want to do anymore…and feel free to add to it.
2. Where do you want to do these things?
With this list of things you’d like to do outside in hand, draw out a real rough sketch of your yard…starting with your property lines, house, driveway, sidewalk, larger trees, and any other major elements of your yard. Don’t worry about straight lines or it being too pretty…just sketch something out.
Now draw blobs with labels where you’d like to do those things that are on your highlighted/prioritized list, e.g., dining space, living space, play space, vegetable garden, etc. It always helps when I tell my clients to think of these blobs in terms of rooms in their home.
But before you go to the next step you’ll need to think logically about where to place these spaces…and if not immediately out your back door, think about how you’re going to get there…think in terms of hallways. For instance… you’d probably want to place an eating area closer to your back door, nearer the kitchen. Likewise, you may want to place a kids play space off to the side nearer the garage where toys will be stored, or your vegetable garden where there is a good deal of sun and access to water.
Now draw arrows as to how you’ll get to these spaces. This step is critical because if you can’t access a space easily, odds are you won’t go there very often and then it will just be one more space you’ll have to maintain…and with little motivation to do so.
3. Think about what you want to see outside from your home.
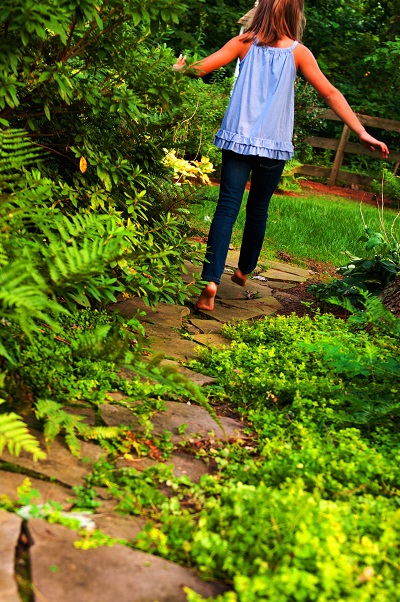
This is something that many people don’t think about, although it is one of the most important things to consider when trying to optimize the value of your outdoor spaces – both functionally and aesthetically. So walk around the inside your home and pause at those windows and doors where you spend most of your time looking or walking through. Then rearrange your spaces (i.e., blobs) to reflect what you want to see…or not see…grounding those spaces in front of your kitchen window, your large bay window, your back door, etc. This is also something you’ll want to consider when choosing plant material – giving yourself something specific and something beautiful to look at.
4. What do you want to highlight…or hide?
One of the primary questions you should ask yourself when coming up with a design for your yard is “What do I want to highlight…or hide?”. Typically in the front yard, standing at the street…you’d want to highlight your front door and how you want your guests to get there…as they approach in their car and as they walk toward your front door. You don’t want to hide your front door with a wall of shrubs or even that ubiquitous crepe myrtle, but you could use both to point your guests in the right direction. By taking the guessing game out of it for them, you’ll create a much more welcoming space for them to enter into.
In contrast, your design should also take into consideration those things you want to hide, for example: any utility boxes, unsightly…but necessary storage (e.g., trash cans), views of the neighbors or streets, etc.
In your backyard, it’s very similar…but instead of thinking of it from the street or sidewalk to your home, it’s the opposite – from your home to the spaces you want your guests to go or not go. Since the backyard is typically less formal and more functional than the front yard, you can be more creative with how you do that and the materials you use.
Paths (in the back) and lighting (in the front and back) are great ways to direct your eye and your guests. Mark your design with all of these elements with more blobs, Xs, and arrows…and you’ll start seeing things take shape into a rough master plan for your outdoor spaces. Congratulations!
5. Have a general plan in mind.
Once you have your master plan roughly sketched out, you can start coming up with a gameplan to start moving things forward. This is where you need to think through reality more specifically, e.g., cost, time, etc.
If thinking of the entire master plan is too overwhelming for you or you know it would cost too much money or take too much time, I’d encourage you to continue to think of your projects in terms of the blobs we discussed above. Take one blob project at a time, as you would in decorating your home…one room at a time. And although it may take a little time to complete your master plan, you’re at least moving in that direction.
The other advantage of taking it one project at a time is your rough master plan can morph with your family’s needs and resources.
That said, you may need do an initial project or two to prepare for the other “blob” projects – e.g., creating the “bones” of your yard…structure of you turf spaces vs. planting or other spaces, irrigation, or cutting down trees, etc. It’s all about strategically sequencing your efforts so that you don’t create more work for you in the future…or have to messing something up you just installed.
Now you can rest and find peace in your plan…taking one blob project at a time, knowing that you have a plan to get to the other projects at a later date.
Lastly, probably the most “prioritizing” factor to consider is cost. At this point you can either start engaging landscape installers to cost things out (and you can ask them to itemize by project and/or by element). And once you’ve done a bit more homework on which plants and materials you want to use, you can start pricing things out on your own.
Now, I hate to leave you hanging out there without my other five Top 10 Landscape Design Tips, but I am…sorry.
But I will leave you with the headings for each of them: 6. Allow the style and lines/features of your home to direct your design; 7. For plant material…think in terms of texture, layers and drifts; 8. Don’t go overboard & don’t be tempted by a plant impulse buy; 9. Pick a palette & stick with it; 10. Recognize that storage is a requirement…but it doesn’t have to be ugly.
Please let me know if you questions about any of these five tips…and make sure to stay tuned for next week’s post where I’ll provide more detail on the other five tips. (Hey…here’s the link to Part 2.)
Alright…now get outside and enjoy the rest of your day…or prepare for even more enjoyable days to come.
You may also enjoy these posts from RYG ...
If you're not already subscribed to RYG and want to get periodic updates, links to new posts & other ground redeeming info ... just enter your email address below. Easy as that!




![[EXCITING NEWS] Apartment Therapy & RYGblog](https://redeemyourground.com/wp-content/uploads/2015/07/Apartment-Therapy-RYGblog2-150x150.png)
I’ve enjoyed reading your blog! Thanks for the info. On our two acre lot we have chosen five areas in which we are going to try to tackle. The first “blob” is a bed on the right coming up the driveway. We needed a hardy, low-growing plant that could grow on a hill in full sunlight. We chose pacific blue juniper. I liked that it stays green all year round and that it is pretty indestructible. I know it’s not fancy… I’ll save that for our back yard. I do have a question though…what are your thoughts about weed cloth? When we first did the bed we put it down so we didn’t have to deal with the weeds…. We then put pine straw on top. The weed cloth does a great job with keeping out the weeds but the pine straw doesn’t stay on it very well. I don’t want to be weeding it all the time. Would you use it ? Thanks.
Beautiful site. love your article about container garden. We just cleared our stone patio last year and put up a new fence and stamped patio. I have a clean slate. Spring is taking a long time to arrive. Will be visiting your site for tips. Thanks!
Thanks so much Karen…for visiting our site, sharing your story, and your encouraging words. I hope you do come back looking for tips & inspiration. Please let me know if there’s something specifically you’d like to see a post on! I hope you have a nice weekend and are able to create some container gardens for your new patio! Take care, D.
Thanks for the advice to look out your windows and plan on what you want to see from that view when your finish the landscaping project. My wife and I decided we would like to look into backyard redesign so that we can incorporate some play spaces for our kids back there, while also having a garden. Being able to see the garden and where the kids are playing from inside the home would be how I would design the backyard.
So glad it was helpful Larry! Thanks for reaching out. Have a great rest of your week…take care, D.
I really want to have a better-looking yard, but I don’t know what I should do. Thank you for all the tips and things I should consider. I’m glad you mentioned that I should ask myself what I want to highlight or add. I think that would really help me narrow down things I want to do.
Thanks Deb! So glad you found this post helpful! I look forward to hearing how things go in your yard. Thanks again and take care, D.
This is some really good information about landscaping design. I just bought my first home that has a backyard. I am super excited to be able to design its landscaping in the backyard. Thanks for mentioning that I should make a list of the things I want in and from my landscape.
Thanks for reaching out Penelope…and so glad that you found the information on this post helpful! Good luck with all your efforts…and please don’t hesitate to reach out if you need any help as you go about “redeeming your ground”! Take care, D.
[…] Top 10 Tips for Landscape Design (Part 1 of 2) […]
All the information that you shared with us is very useful for us. Keep sharing…
We are planning to landscape our new yard. We recently bought a home and the previous owner did not keep up with the yard to say the least. We are making our checklist of what we need done, even down to what we need to get. This post is super helpful! Thanks for sharing!
So glad it was helpful, Quincy! Good luck with everything, D.