How to Make a Pinecone Garland
One fall-into-winter outdoorsy decoration that has graced our mantel for many years now is a simple pinecone garland. It’s very easy to make and will hardly cost you a thing. And for those of you who don’t think that you’re crafty, I’m confident that you too can so do this! Really, it’s so straightforward and requires very little creativity. Regardless, the final product is beautiful, textured, and will help your house feel more like home this Holiday season.
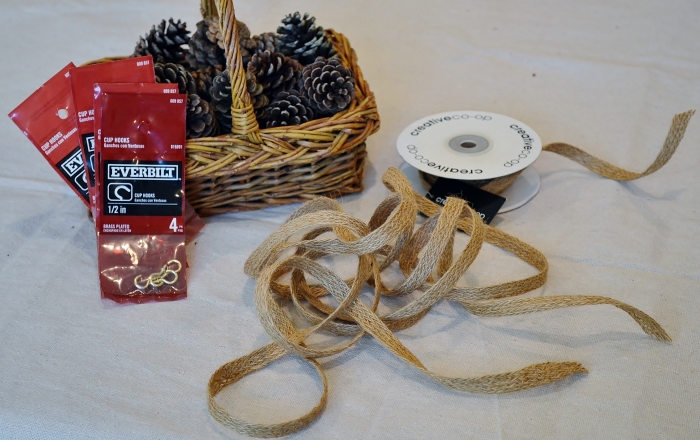
Supplies Needed for Your Pinecone Garland
-
- Burlap or jute ribbon
- 1/2” cup hooks…as many as you have pinecones
- Mini pinecones – the # depends on how long you need your garland to be and the preferred spacing of your pinecones.
- If you can’t find these little pinecones in your backyard…grab a bag and go take a walk in your neighborhood or a hike at a local trail. You’ll likely not only find what you’re looking for, but many other treasures along the way.
- But if you still strike out, you can buy some here.
- 2 3/4″ cup hooks or 2 finishing nails to hang your garland
Instructions for Your Pinecone Garland
-
- The first thing you do is cut your ribbon. I cut mine about 10 ft long…but your length will depend on where you’re hanging yours and how much excess you want dangling down on either end. It’s better to initially have too much ribbon than too little…since you can always trim it down if you need to. I like having quite a bit of ribbon hanging on the sides so I cut mine longer. But it’s totally a personal preference. I’m hanging mine on our fireplace mantel…which is a pretty standard size (about 6.5′ wide). But if you want to hang it in a window or somewhere else, your measurement will likely be different.
- Next you need to prepare your pinecones. I’m using 15 for my garland…but regardless, I recommend using an odd number so that you’ll have a pinecone hanging in the center of your garland and an even number hanging on either side.
- First, use gardening clippers to cut off any twig or twig stump as close as you can to the pinecone. It doesn’t have to be completely flush, but you just don’t want a large nub sticking out.
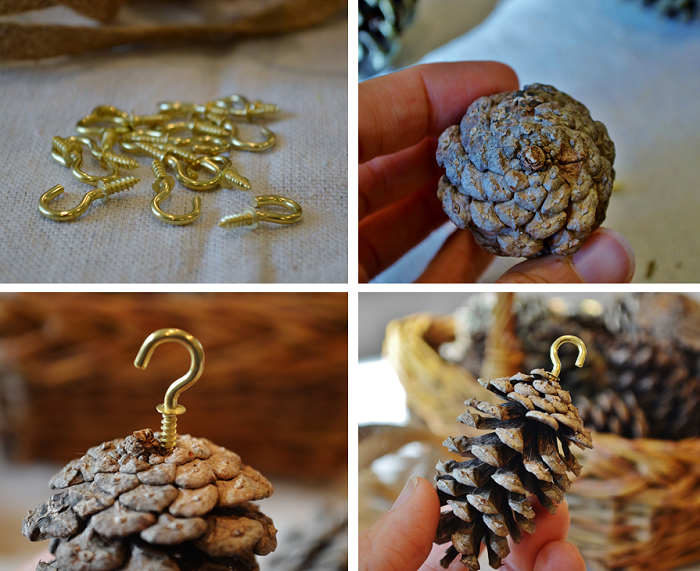
- Then you will screw the hooks into the flat end of your pinecones.
- Find the flattest part in the center of the base, as close as you can to the twig nub, but not on top of it. You want to make sure that you are screwing into the thickest, most solid part of the pinecone.
- I find it easiest to cradle the whole pinecone in my left hand (I’m right-handed), holding it firmly yet gently…and then use my right hand to screw the hook in. I find it helps to turn the pinecone toward me as I turn the screw away from me while putting pressure from both sides.
- Generally the pinecones are pretty tender…so once you get the initial hole started it’s easy to screw it in. Getting it started is the hardest part. However, some pinecones can be a bit stubborn…harder to manage and bit more brittle. So if you’re working with one of those, just set it aside and move onto another.
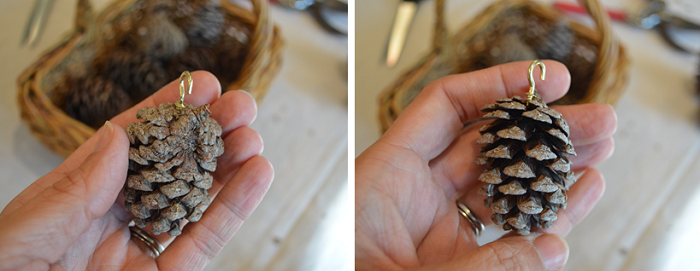
- Once you have all the hooks screwed into your pinecones, you will want to turn them so that the curve of the hook is pointing away from the most attractive side of the pinecone. This will allow you to hook your pinecones into your ribbon with the best side facing out.
-
-
-
- Even pinecones that have blemishes on one side can still be used…since you can hang the ugly side pointing toward back.
-
-
-
- With all your pinecones ready and waiting to be hung, now it’s time to hang your ribbon…
- We already have larger cup hooks hung under our mantel for where we hang our stockings each Christmas and we leave them up all year since they are pretty much hidden. So I just hung my garland on the farthest 2 hooks.
- But if you don’t already have hooks in place, simply just screw some in…our farthest hooks are about 6 or so inches from the ends of our mantel. You can either keep your hooks there for other seasonal displays or remove and store them with your garland (in a place that you’ll remember!!!) to use next fall.
- If you’re hanging your garland in a window…just use two finishing nails nailed to the top of the molding.
- The actual hanging of your garland may take a bit of trial or error…
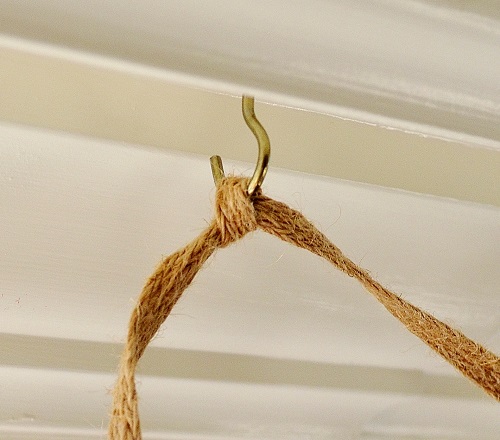 Leaving about 2-2.5′ of ribbon hanging off the end, tie a simple knot around one of the hooks.
- Take the other end of the ribbon and with it threaded through the other hook raise it so that it hangs down as far down as want it to in then center. Then tie a simple knot around that hook.
- Now step back and see how it looks. You will most likely have to play with it a little bit…shortening or lengthening it on each side to make the garland hang how you want it to.
- Then cut the ribbon so that there’s the same amount of ribbon hanging on each side.
- Now that you’ve hung your ribbon, it’s time to hang your pinecones…
- Find the center of the ribbon and hang your first pinecone. Simply take the cup hook that’s on the end of your pinecone and put it through the center of the ribbon…easy-peasy!
- All that’s left is to hang the rest of the pinecones…one to the left and one to the right of the center pinecone…equidistant apart. I hung mine about 4.5” apart, but you can totally eyeball this.
- Keep adding pinecones in this manner until you reach the ends of the garland.
- With all your pinecones ready and waiting to be hung, now it’s time to hang your ribbon…
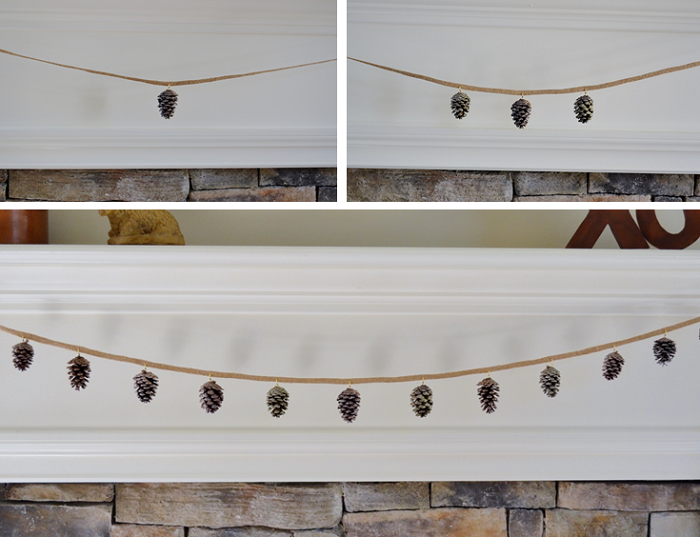
-
- Once all your pinecones are hung, step back to see how things look…then make whatever adjustments you need:
- If the spacing or sizes of your pinecones looks a bit wonky, simply take them out and move them around…it’s so easy to do.
- You may also want to raise or lower your garland…which again is so easy…untying and tying your knots.
- Once all your pinecones are hung, step back to see how things look…then make whatever adjustments you need:
That’s it…you’re done!
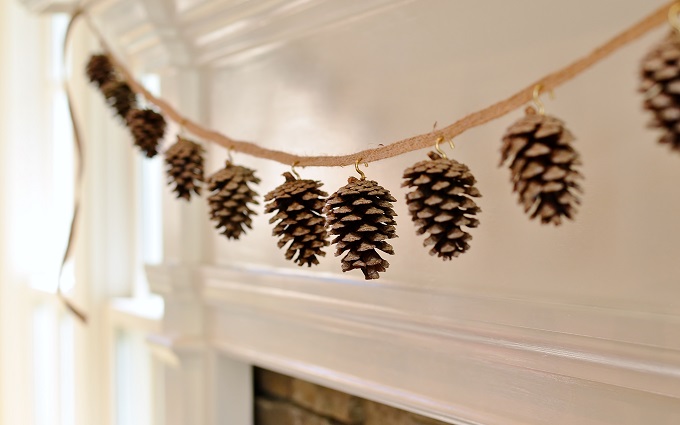
![]()
One of the wonderful things about this type of project is that it’s what we like to call perfectly imperfect. The pincecones’ sizes and shapes don’t have to be exact and neither does the spacing between pinecones. The beauty is in the variability – so enjoy the freedom in that!
There you have it – your very own pinecone garland! A beautiful and easy way to bring the outside in – adding life and warmth to your indoor spaces. How awesome is that for redeeming your ground!
Take care all,

![]()
We’re proud to be partnering with Monrovia … the plant company of all plant companies … on this Outdoors-In Holiday Décor series for their Grow Beautifully blog. And in case you didn’t know … for generations Monrovia has worked very hard to provide its customers with the healthiest and most beautiful plants to grace their homes and outdoor spaces. Regardless, all the thoughts and opinions shared on this post are ours.
You may also enjoy these posts from RYG ...
If you're not already subscribed to RYG and want to get periodic updates, links to new posts & other ground redeeming info ... just enter your email address below. Easy as that!






Love this, Brit! I am inspired 🙂
Glad you’ve been inspired Jane! That’s always our hope!
I can’t wait to make this!!! Love it! Perfect fall decoration:)
Thanks Kat! Lots of these little pinecones at the lake. Next time you are there make sure to gather a bunch! It’s really so easy to make! And looks so great on our mantle!
So cute. I picked up a shopping bag of pine cones when vacationing in the Black Hills of South Dakota this past summer and I need a good project to use them. Thanks for sharing.
Deb…thanks for the comment my chicken-loving-friend! This project is sooo very easy! And there are so many other projects you can use all your Black Hills, SD pine cones in. Let me know what other things you find to do with them…would love to share your creative ideas with the rest of our fellow ground redeemers! Take care, D.
Love this and will get this made and hung before Thanksgiving. Thanks!
Gail…I am so glad you were inspired to make one. My sister said you might use scented pinecones. That sounds like a great idea…looks cute and smells good too! Can’t wait to hear how it turns out. Thanks for subscribing to the blog too! Hope you enjoy it! Happy Thanksgiving! -Brittany
[…] Chauffez les pommes de pin au four pendant quelques minutes pour éliminer les petits insectes, puis vissez un crochet à la base de chaque pomme de pin et attachez-les sur une longueur de ruban en fibres naturelles, comme l’ont réalisé les blogueurs de Redeem Your Ground. […]
[…] Via Redeemyourground […]
[…] up everything you need to transform your patio or dining room into a celebratory space. This lovely pinecone garland decor is a great project for the kids to help with. All you need is some cup hooks, some burlap or […]
[…] pine cone garland DIY is made by attaching mini pinecones to a jute or burlap ribbon with cup […]
[…] Pinecone Garland […]
[…] Pinecone Garland from Redeem Your Ground […]
[…] A pinecone garland would make a festive piece of décor for a camping party, plus you can reuse it again for the winter holidays! You’ll need some jute ribbon or twine, hooks, and pinecones. It’ll be even more special if you go round up the pinecones from your own backyard! | Redeem Your Ground […]
[…] green, and creme with this balloon arch, banner, and backdrop adding in cute animal decorations or DIY decorations as you […]
[…] Guirnalda de piñas de Redime tu suelo […]
[…] Pinecone Garland by Redeem your Ground […]
[…] Pinecone Garland from Redeem Your Ground […]
[…] Pinecone Garland from Redeem Your Ground […]
[…] Pinecone Garland from Redeem Your Ground […]